

Fraud detection
A Fraud Detection Group defines the filters applied to an offer’s clicks, conversions, and impressions. Configure the group once, then assign it to multiple offers. Use the offer’s Settings > Fraud Prevention section to manage its assignment and rejected-click strategy. The separate Fraud Detection tab shows traffic insights.
Before you begin
Section titled “Before you begin”- Create an offer you want to protect.
- Decide which traffic kinds need filtering: clicks, conversions, impressions, or all three.
Create a fraud detection group
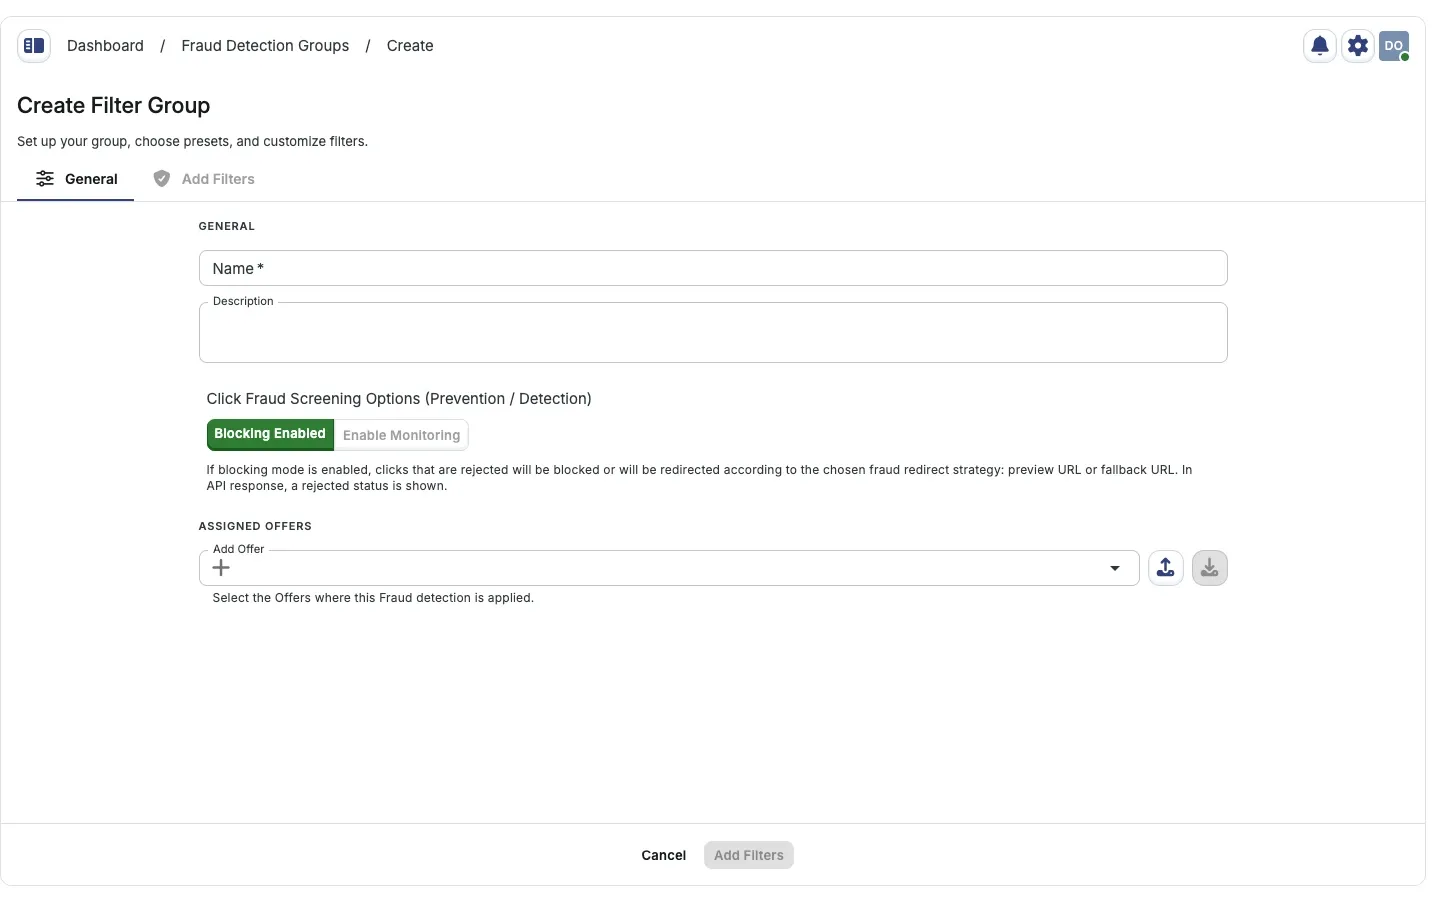
Section titled “Create a fraud detection group”- Go to Offers > Fraud Detection Groups in the main menu and click Create.
- In General, enter a Name and an optional Description.
- Choose Blocking Enabled or Enable Monitoring. Monitoring evaluates traffic without enforcing the group’s blocking behavior.
- In Assigned Offers, select the offers to protect. You can assign them later instead.
- Click Add Filters to open the filter catalog.
- Configure individual filters, or use Browse Click Filters Preset and Browse Conversion Filters Preset to inspect a preset. Previewing is read-only. Applying a preset during creation changes only this draft.
- Click Create Filter Group to save the group and open its detail page.
Edit filters and browse presets
Section titled “Edit filters and browse presets”Open a saved group and select Filters. Use the traffic-type and status segments to narrow the catalog. The search icon opens filter-name search. Select a card to inspect its settings, or use its available per-traffic switches to enable or disable a filter.
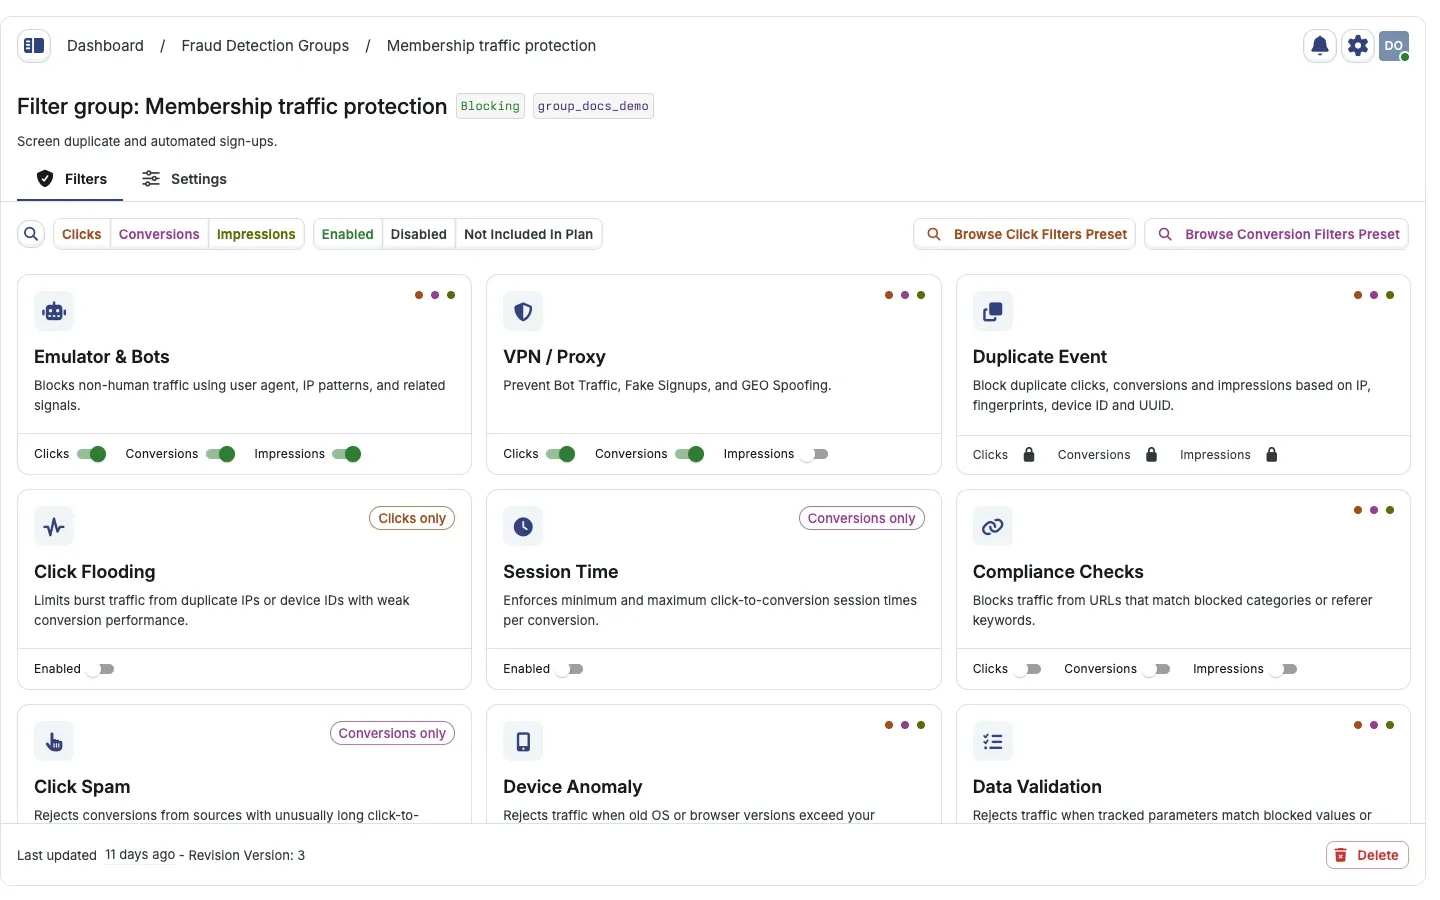
Changed cards show Modified until you save, discard, or restore their previous settings. Click Save changes to persist ordinary filter edits.
To inspect a preset, choose a preset from the relevant Browse Filters Preset control. Save or discard existing edits before entering preview. Preview cards show whether each filter is enabled in the preset; enabled, available cards open read-only settings. Close Preset Preview leaves the saved configuration unchanged. Apply this Preset saves it to the selected traffic type on a saved group. Filters marked Not included in Plan are unavailable.
Use Settings to change the group name, description, screening mode, and Assigned Offers. Saving changes to a shared group affects the offers assigned to it.
Assign a group to an offer
Section titled “Assign a group to an offer”- Go to Offers > Offers Management and open the offer.
- Select Settings, then Fraud Prevention in the section navigation.
- Search for a group in Add to Fraud Detection Group and select it.
- Review the enabled-filter chips below the selection. Click a chip to inspect its settings without changing them. The Edit Filters action opens the group in a new tab.
- Click Save changes. Selecting a group alone does not save the assignment; Discard restores the previous selection.
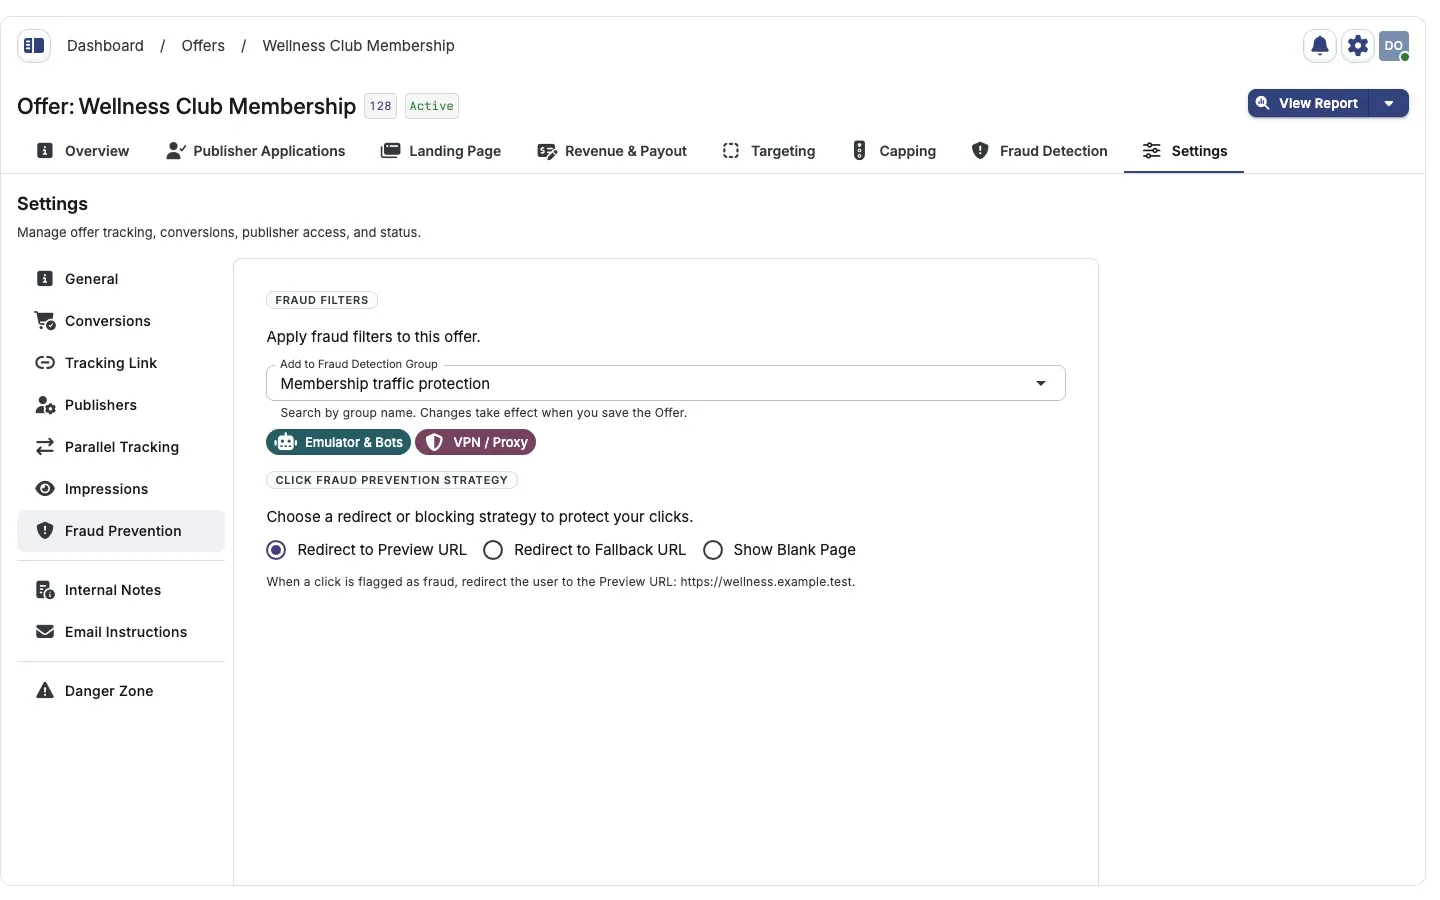
You can also assign offers from the group’s Settings > Assigned Offers section.
Choose the rejected-click strategy
Section titled “Choose the rejected-click strategy”In Settings > Fraud Prevention, select a Click Fraud Prevention Strategy:
| Option | Behavior |
|---|---|
| Redirect to Preview URL | Redirect flagged clicks to the offer’s Preview URL |
| Redirect to Fallback URL | Redirect flagged clicks to the Fallback URL you enter |
| Show Blank Page | Display a blank page instead of the offer landing page |
Redirect to Preview URL is unavailable until you set General > Landing Page > Preview URL in Offer Settings. If that URL is removed while the strategy is selected, restore it or choose another strategy before saving. A group in Monitoring mode does not enforce this fraud redirect strategy.
Review traffic insights
Section titled “Review traffic insights”Open the offer’s Fraud Detection tab, between Capping and Settings. Select Clicks, Impressions, Conversions, or Events, then choose a section such as Fraud Analysis, Traffic Sources, Audience Profile, or Device & Fingerprint. Available sections depend on the traffic type.
The time-range control at the upper right defaults to Last 30 Days and supports custom dates. The views are filtered to this offer. Empty sections mean no data was returned for that view and period, not that the offer is protected from all fraud.
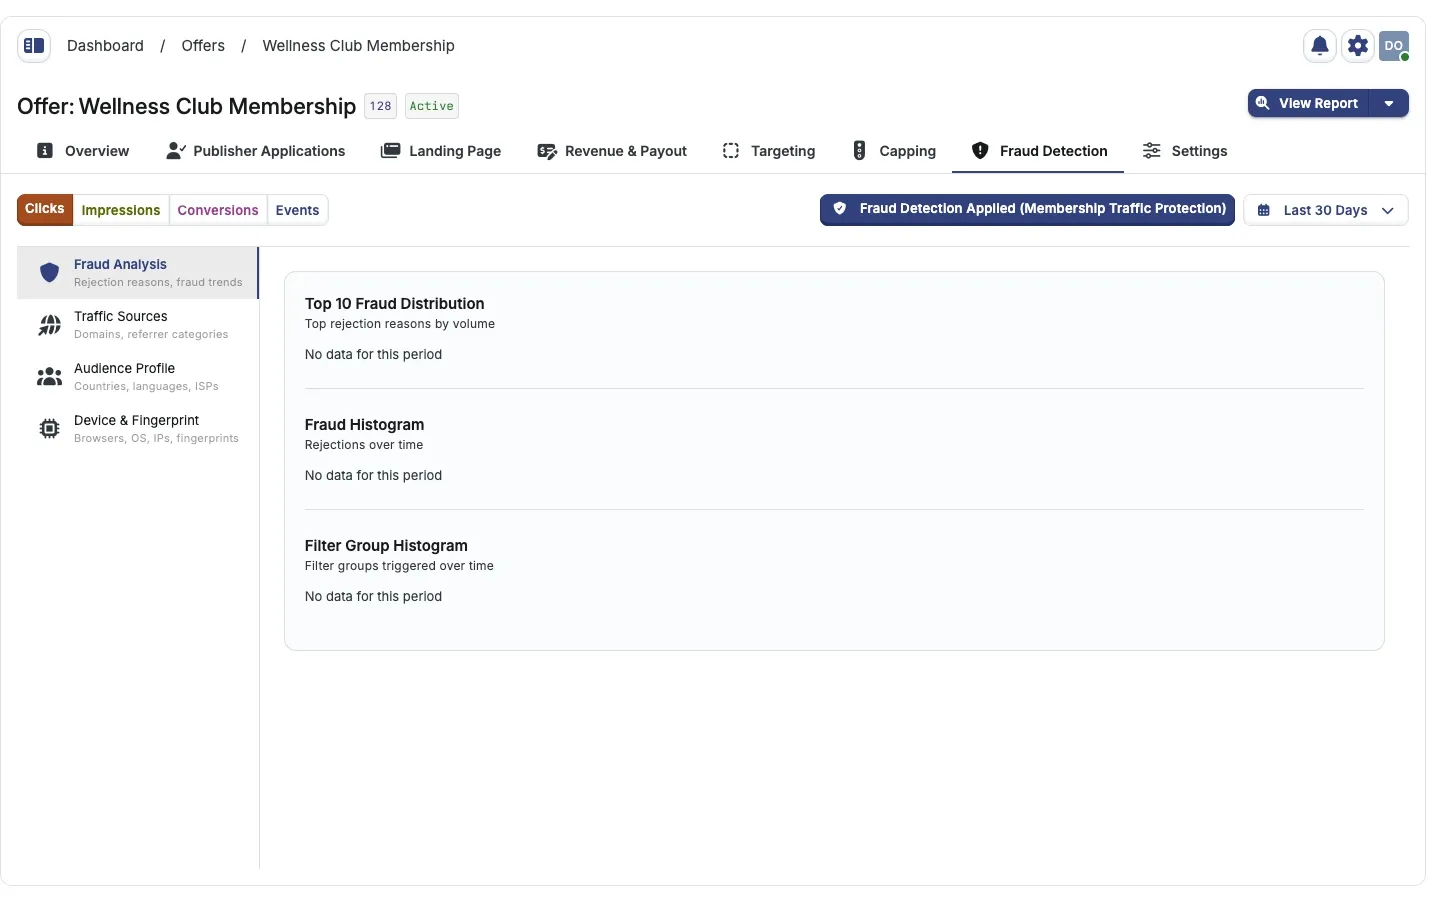
The group-status button beside the time range opens Settings > Fraud Prevention. When a group is assigned, hover over or focus the button to preview its enabled filters. Reviewing reports does not change filter settings or the assignment.
Conversion and custom-event filters
Section titled “Conversion and custom-event filters”From Revenue & Payout, edit the default Conversion row to open its standalone page. Its Fraud Detection tab shows only enabled conversion filters inherited from the assigned group. This catalog is read-only. Use Edit Fraud Prevention Settings in the information banner to manage the assignment.
Custom events have their own Fraud Detection tab on the Event settings page. Configure those filters there and save the Event, rather than editing them in the offer’s traffic-insights tab. See Revenue and payouts.
Fingerprint requirement
Section titled “Fingerprint requirement”For fingerprint-based detection to work, enable JavaScript/fingerprinting tracking for the offer and have publishers use the resulting tracking links. Browser signals are collected at click time for the applicable filters.
Next steps
Section titled “Next steps”- Enable JavaScript tracking so fingerprint signals are available.
- Browse the Fraud Prevention guide for platform-wide fraud detection details.