

Migrate from Trackier
Connect a Trackier network account to copy campaigns and related configuration into Integr8. Trackier supports Network connections only and syncs active records.
Before you begin
Section titled “Before you begin”- You need your Integr8 email address and password.
- In Trackier, go to Automation > API and prepare the API key. See Trackier Network API setup.
- Confirm that the Trackier API allows the Migration Tool server IP if your account uses IP restrictions.
What you can migrate
Section titled “What you can migrate”| Trackier entity | Integr8 result | Conditions |
|---|---|---|
| Advertiser | Advertiser | Advertisers referenced by active campaigns |
| Publisher | Publisher | Active publishers |
| Publisher account | Publisher login user | Active publisher with a valid email address |
| Campaign | Offer | Active campaigns only |
| Landing | Landing page | Valid supported URL macros |
| Goal | Event | Supported payout configuration |
| Publisher-specific payout | Custom payout | Supported fixed or revenue-share payout without unsupported conditions |
| Conversion postback | Postback manager | Valid URL, method, status, and supported service type |
Creatives and historical reporting data are not migrated.
Create a Trackier Network connection
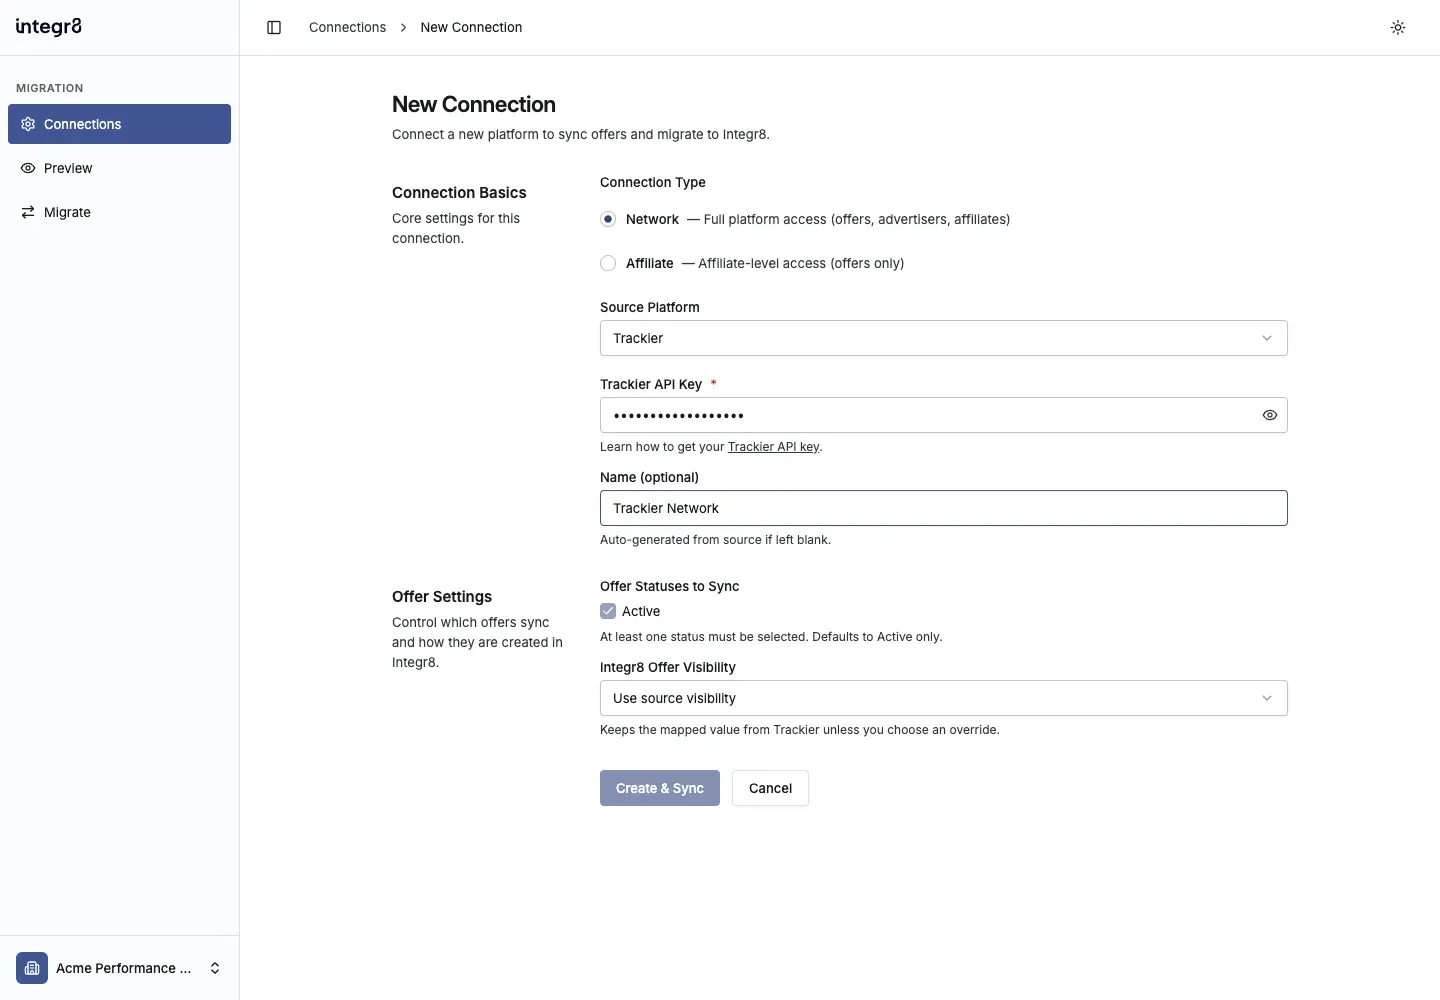
Section titled “Create a Trackier Network connection”In this step, you authorize read-only access to the Trackier network and choose how active campaigns will be represented in Integr8.
- Open the Migration Tool and sign in with your Integr8 credentials.
- On Connections, select Add Connection.
- Keep Connection Type set to Network.
- Set Source Platform to Trackier.
- Paste your key into Trackier API Key.
- Enter an optional Name for the connection.
- Under Offer Statuses to Sync, keep Active selected. Trackier connections sync active campaigns only.
- Under Integr8 Offer Visibility, keep Use source visibility or choose an override.
- Select Create & Sync.
Sync Trackier data
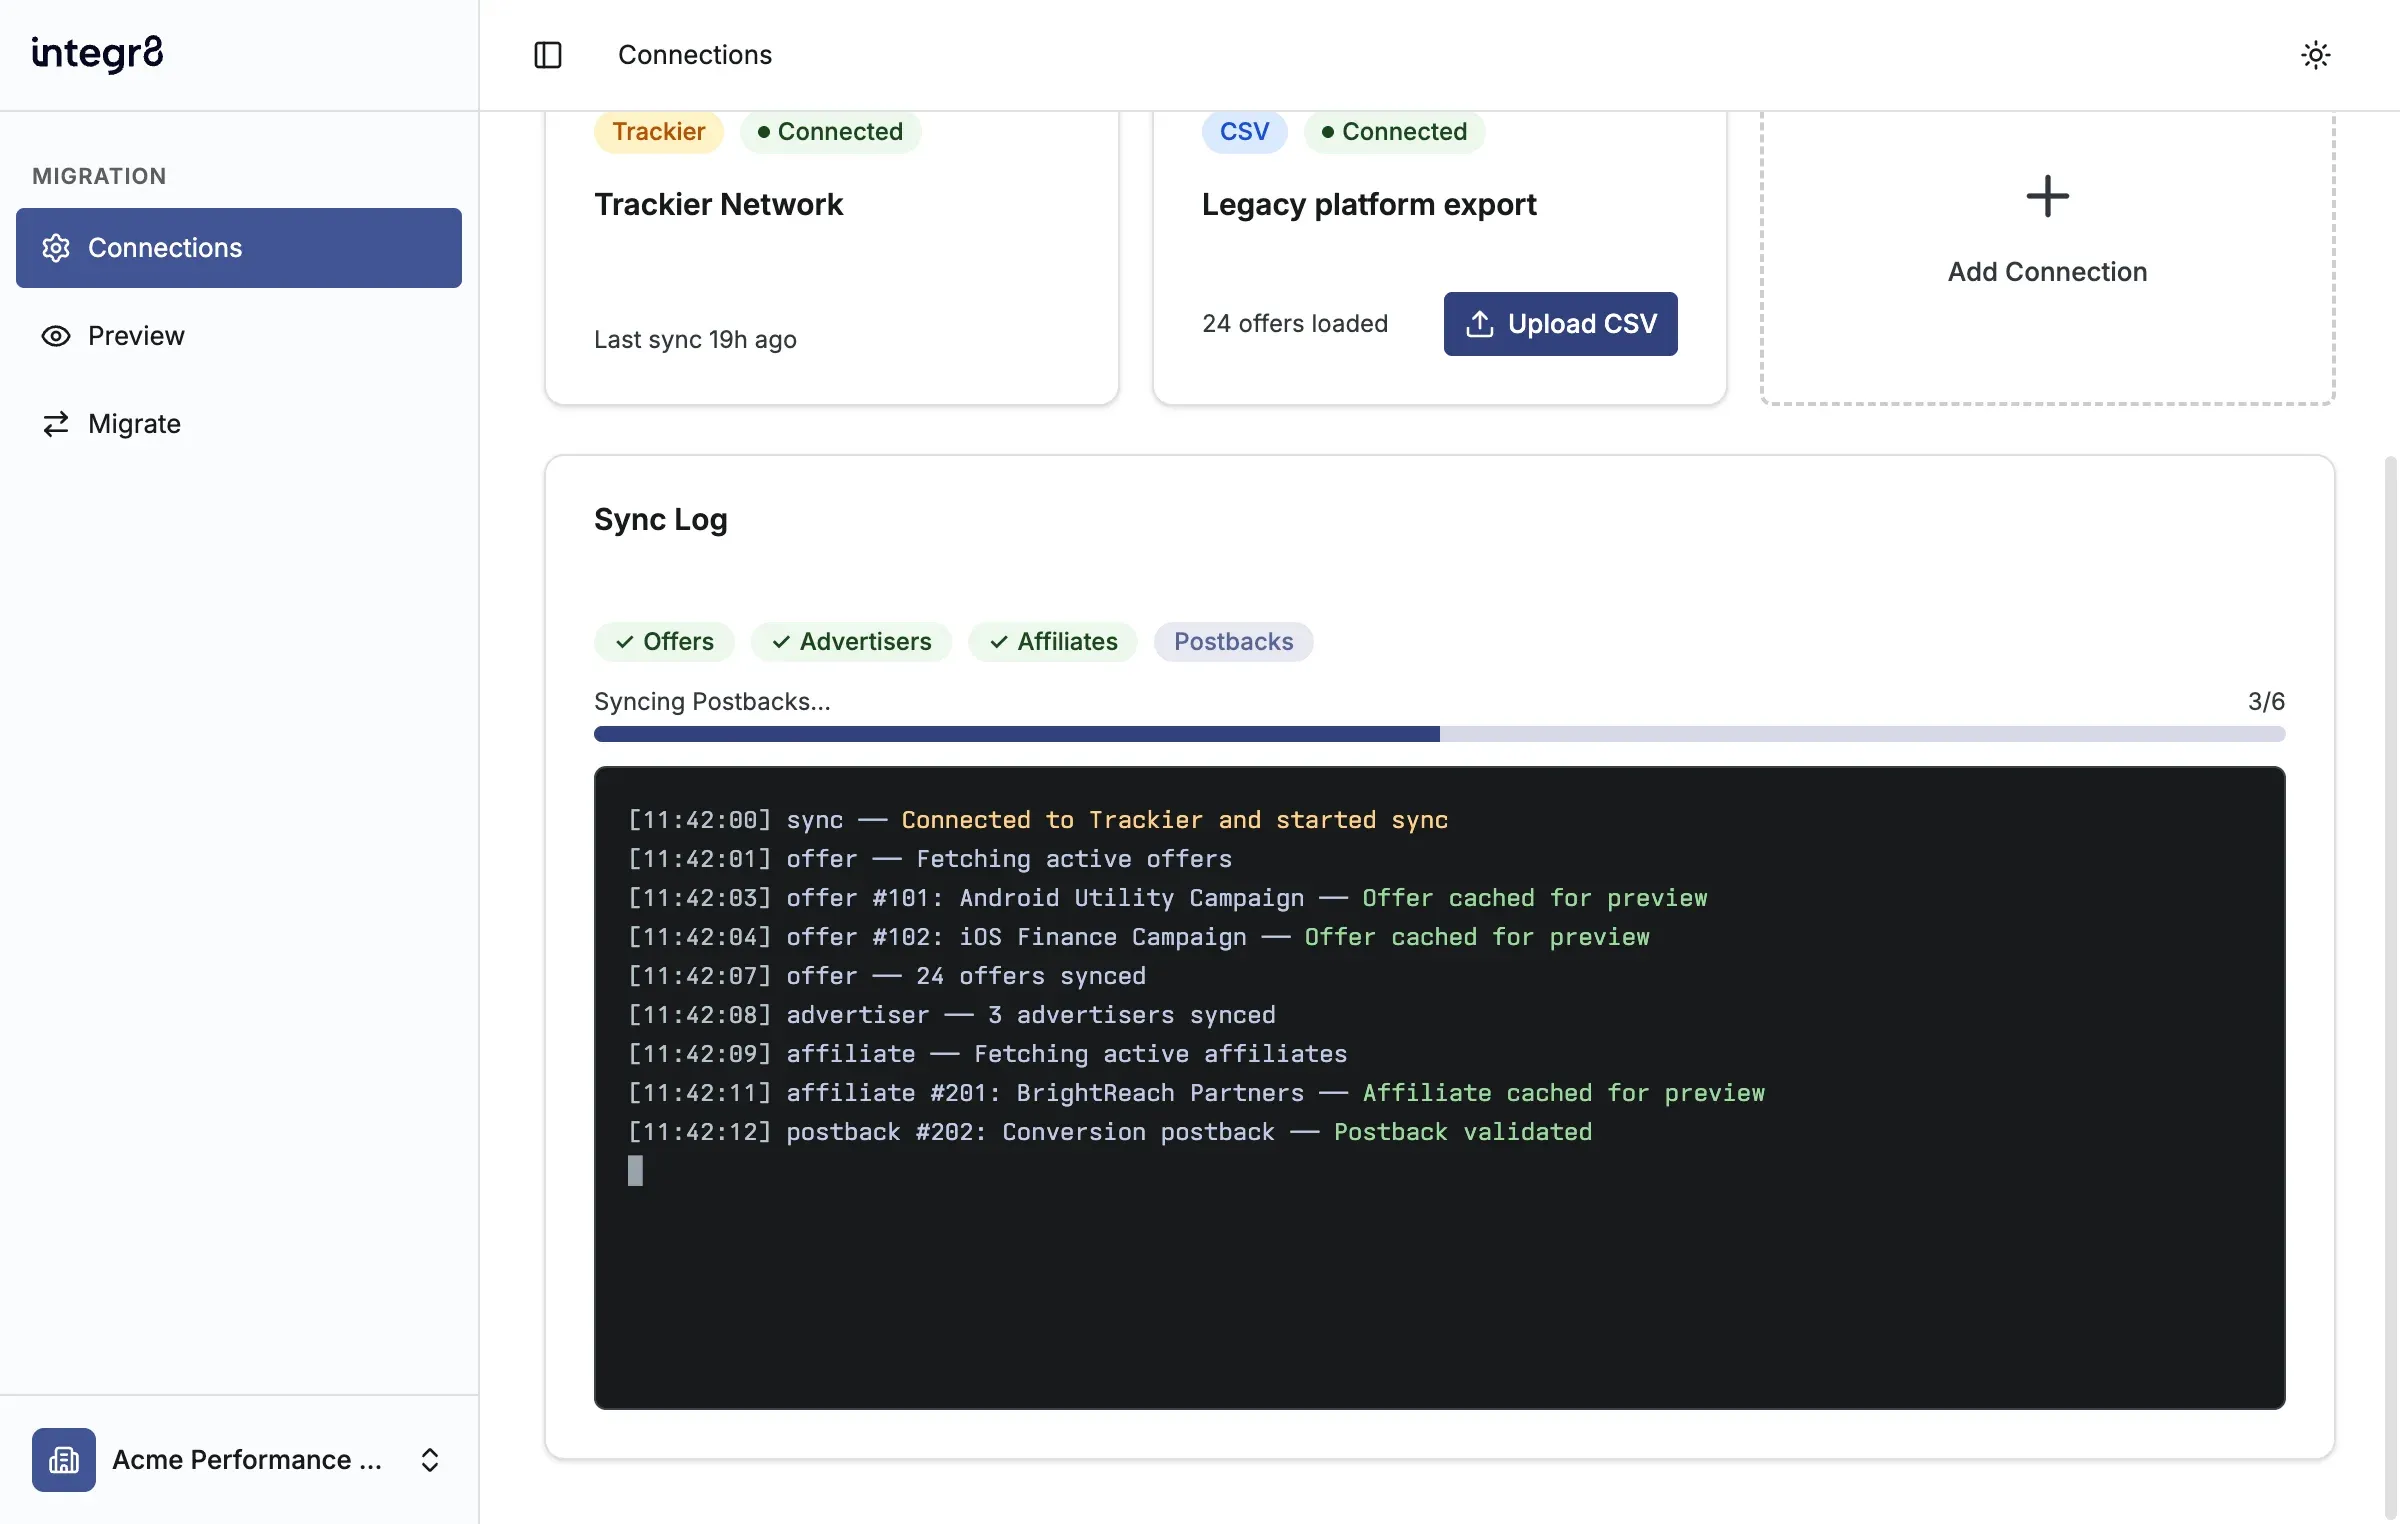
Section titled “Sync Trackier data”The sync copies active Trackier campaigns and their related records into a temporary Migration Tool preview. It does not change Trackier or create records in Integr8.
- Follow the Offers, Advertisers, Affiliates, and Postbacks phase badges in Sync Log.
- Review each live log entry as records are cached and postbacks are validated.
- Wait for the sync to complete before opening Preview.
Review and migrate Trackier data
Section titled “Review and migrate Trackier data”In this step, you verify every supported mapping, identify values that must be omitted for safety, and choose the campaigns or related entities to migrate.
- Open the Trackier connection card.
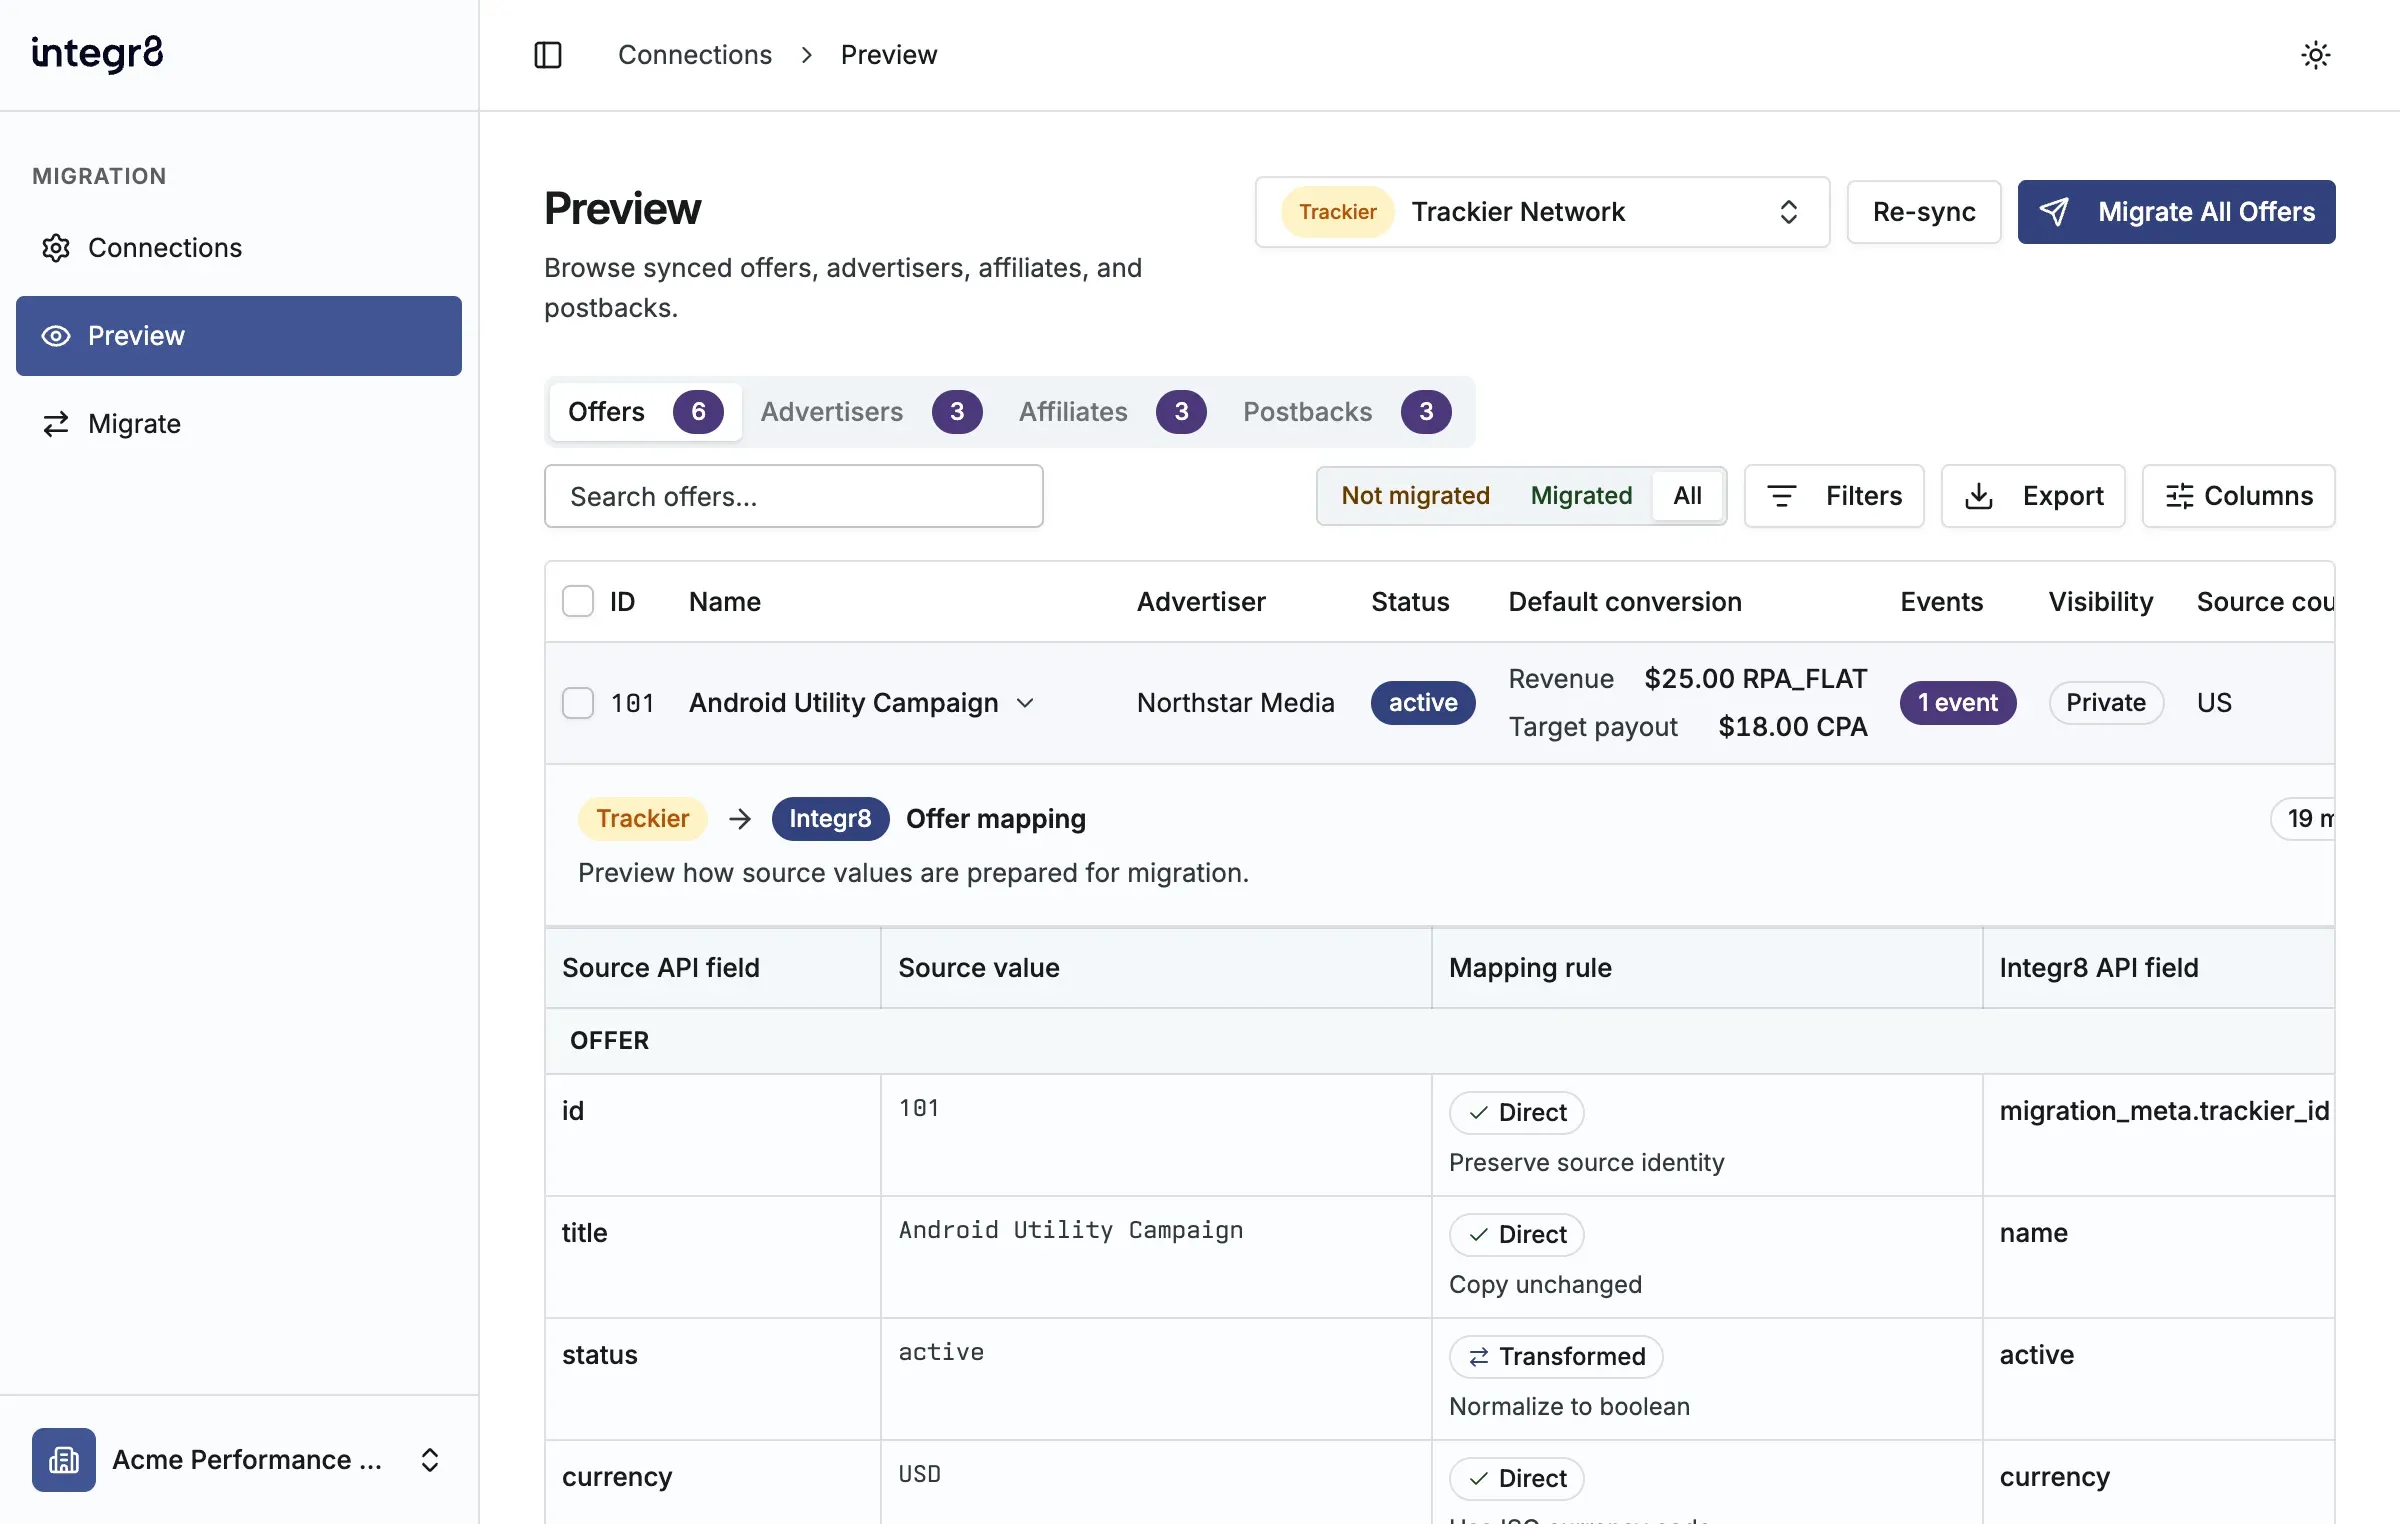
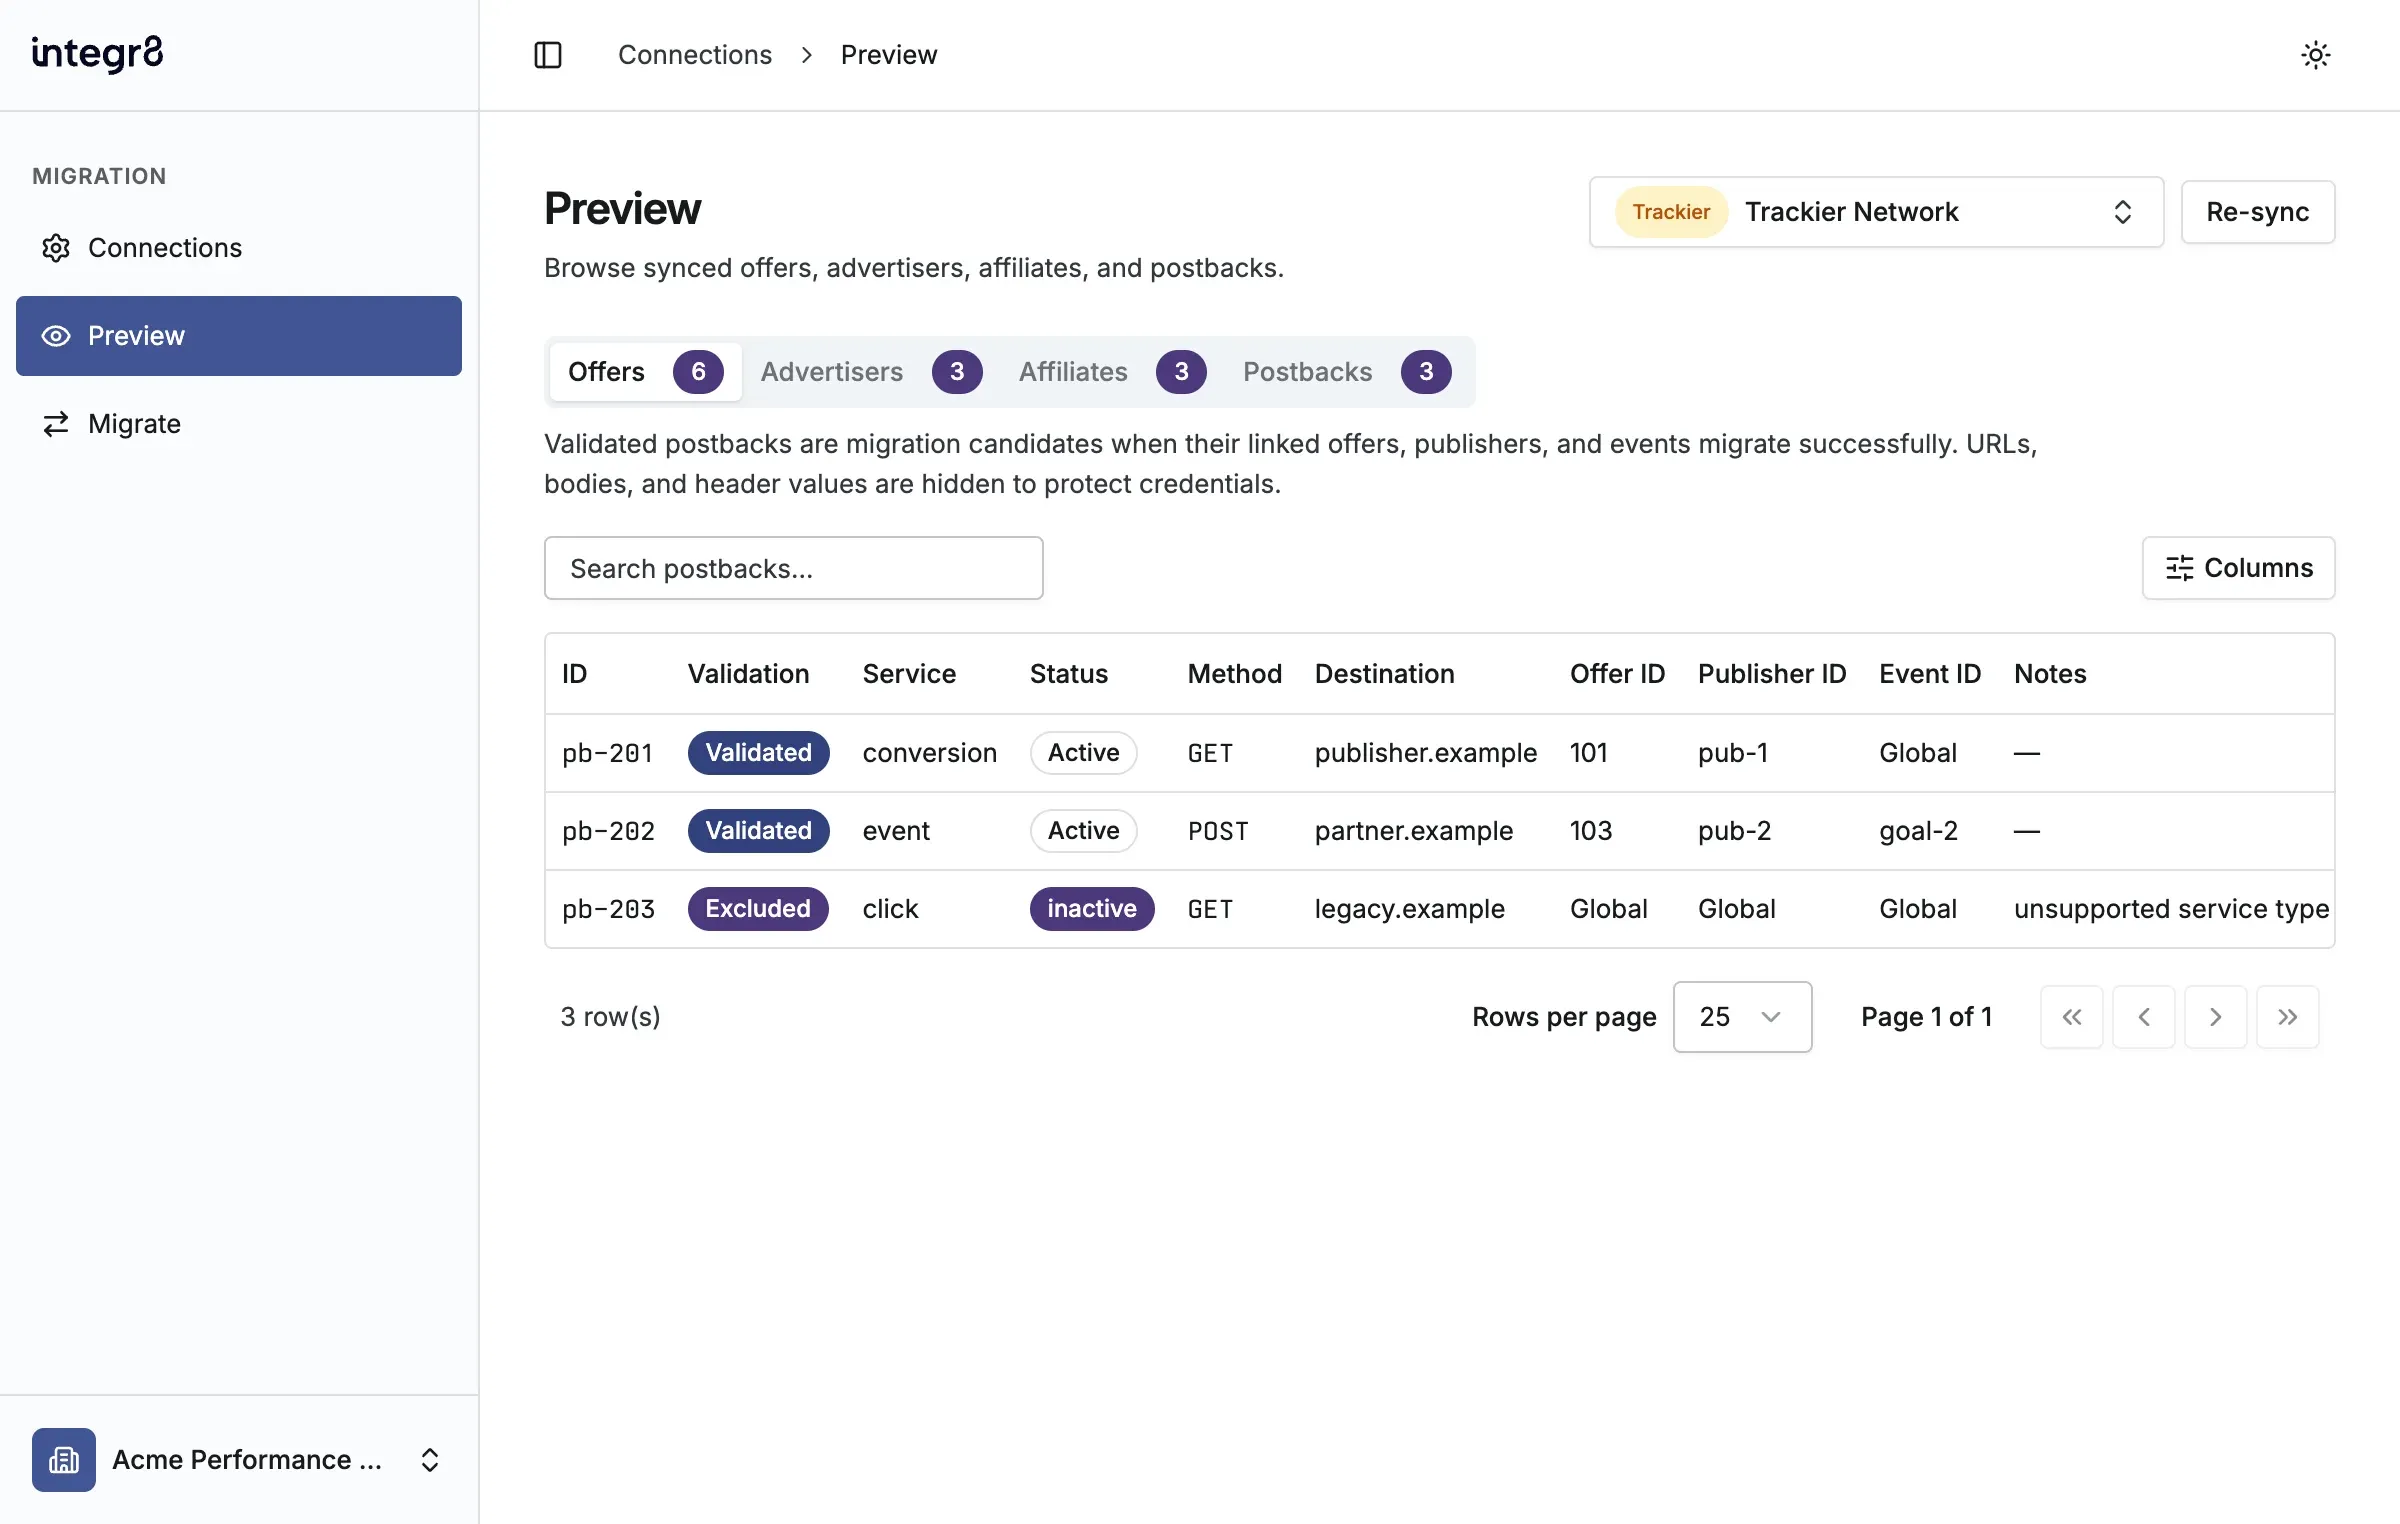
- Review Offers, Advertisers, Affiliates, and Postbacks on Preview.
- Expand a campaign in Offers to compare its Trackier values with the Integr8 offer, URLs, economics, events, targeting, and warnings that migration will produce.
- Check Omitted mapping rows carefully. The tool skips conditional payout or targeting rules when removing the condition could broaden their scope.
- In Postbacks, check the Validation and Notes columns. Excluded postbacks are not migrated. Destination shows only the host, while URL paths, request bodies, and header values stay hidden to protect credentials.
- Correct unsafe source conditions in Trackier, then use Re-sync to refresh the preview. Trackier URL macros without a safe Integr8 translation remain unchanged for manual verification.
- Select the campaigns, advertisers, or publishers you want to migrate.
- Use the corresponding Migrate action, or use Migrate All for the active tab.
- Confirm the count and select Start Migration.
Migrating offers may include publishers required by campaign access, custom payouts, or postbacks. To migrate every active Trackier publisher, migrate the Affiliates tab separately.
Review migrated data
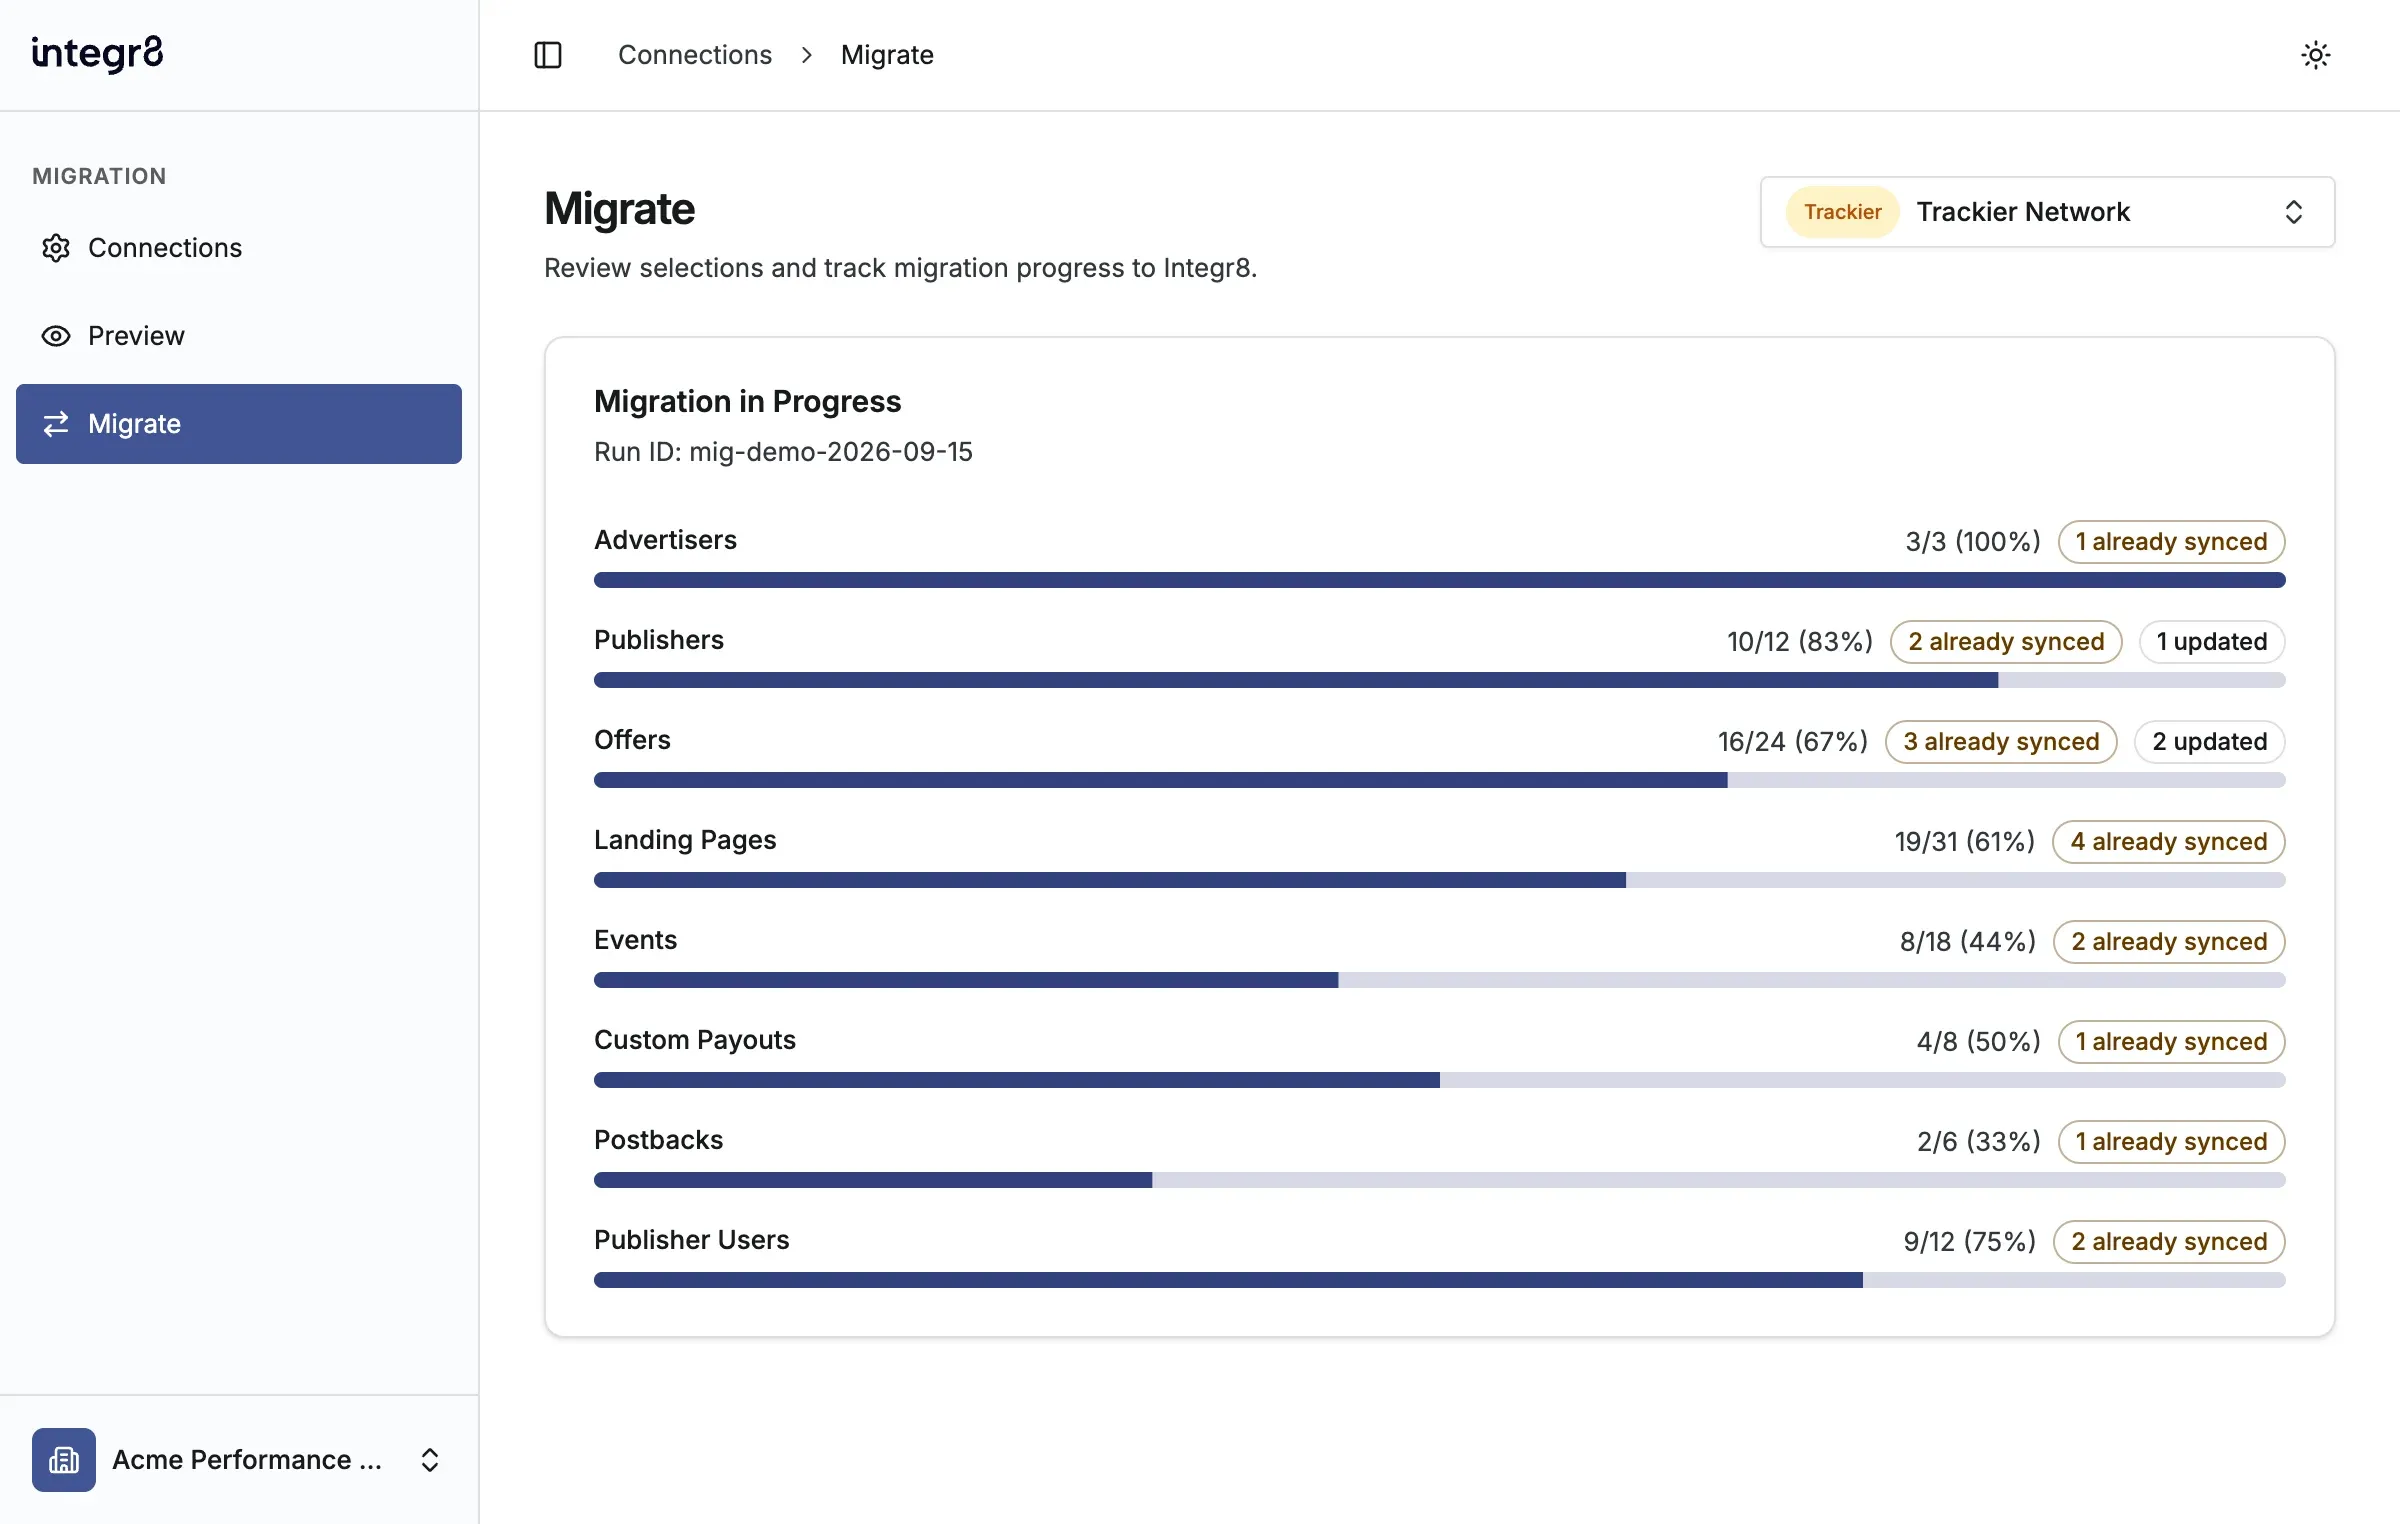
Section titled “Review migrated data”Use Migrate to follow all Trackier dependencies as Integr8 records are created or reused. Publisher users, custom payouts, and postbacks appear only when their required publisher, campaign, goal, and postback data is eligible.
- Keep the Migrate page open while the migration runs.
- Review entity progress and the migration log for created, updated, already synced, failed, or skipped records.
- When the migration finishes, review every warning and Omitted mapping before using the migrated offers.
- Open the resulting records in Integr8.
Re-sync or change settings
Section titled “Re-sync or change settings”- Correct data in Trackier when a row is excluded or a warning identifies an unsupported value.
- Use Re-sync on Preview to refresh campaigns, targeting references, publishers, advertisers, and postbacks.
- On Connections, open the connection action menu and select Edit to update visibility or the API key.
- Leave the API key blank while editing to keep the saved key.
If Trackier rejects the API key or IP address, contact your Trackier administrator. For Migration Tool help, email support@integr8.co.