

Migrate from Everflow
Connect Everflow to copy offers and related configuration into Integr8. Use a Network connection when you manage the Everflow network, or an Affiliate connection when you only have partner access.
Before you begin
Section titled “Before you begin”- You need your Integr8 email address and password.
- For Network access, create or copy an Everflow Network API key from Control Center > Security > API Keys. See Everflow security settings.
- For Affiliate access, prepare your Marketplace API key. See Everflow Marketplace API keys.
- For Affiliate access, create the destination advertiser in Integr8 first.
Choose the correct connection type
Section titled “Choose the correct connection type”| Access in Everflow | Connection type | What you can migrate |
|---|---|---|
| Network operator | Network | Advertisers, active publishers, offers, landing pages, and events |
| Marketplace partner or affiliate | Affiliate | Live offers, landing pages, and events assigned to one existing Integr8 advertiser |
Creatives and historical reporting data are not migrated.
Create an Everflow Network connection
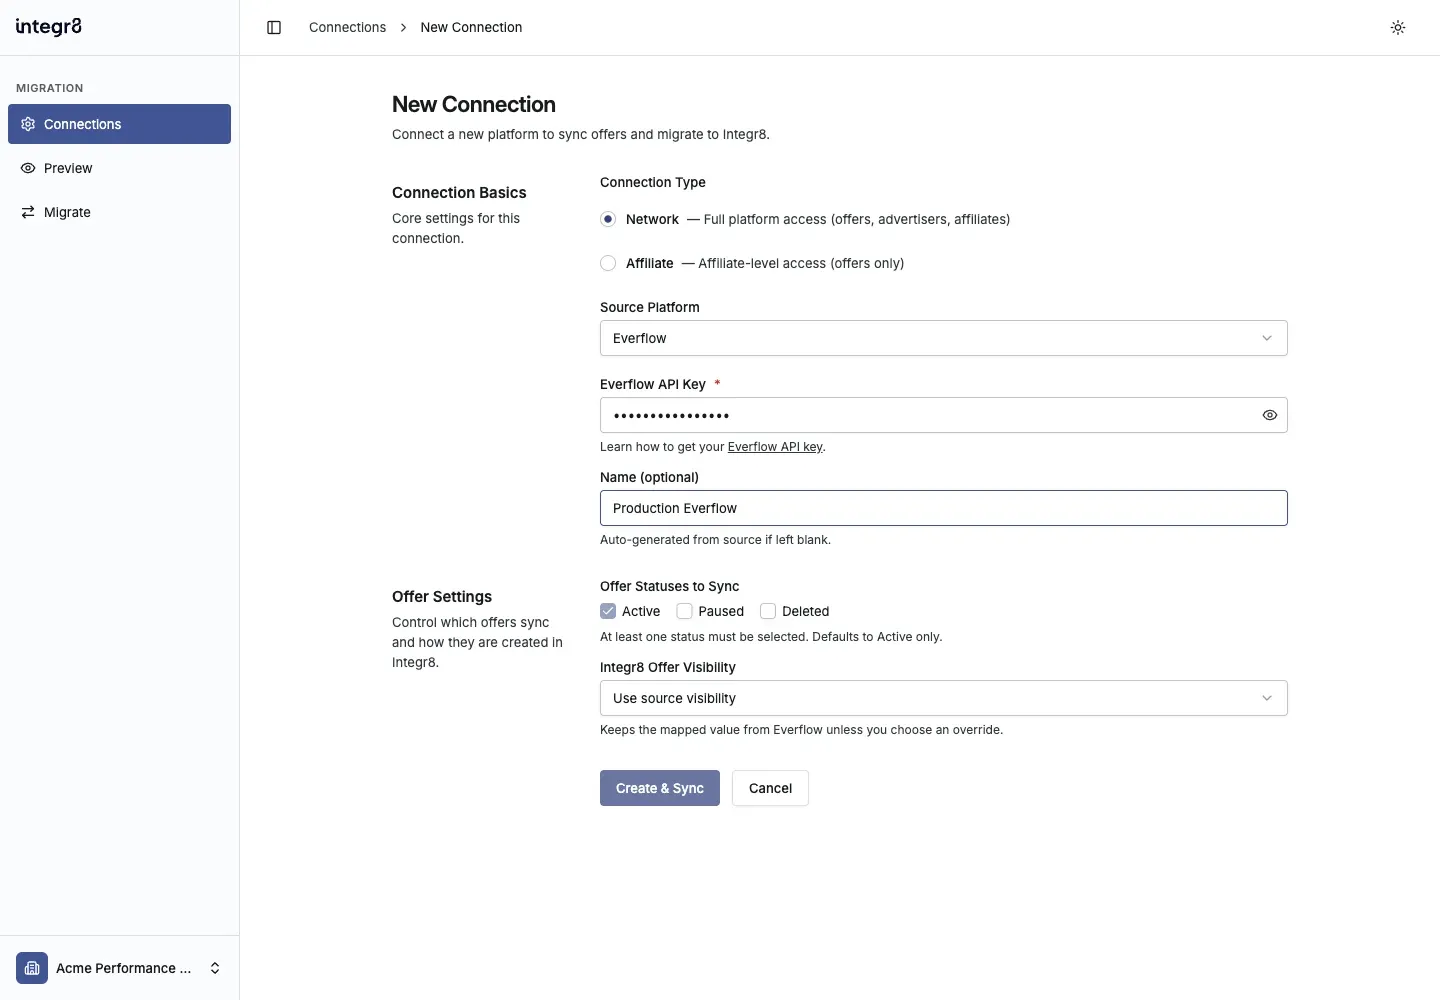
Section titled “Create an Everflow Network connection”In this step, you authorize the Migration Tool to read your Everflow network and choose which offer statuses and visibility values to prepare for Integr8.
- Open the Migration Tool and sign in with your Integr8 credentials.
- On Connections, select Add Connection.
- Set Connection Type to Network.
- Set Source Platform to Everflow.
- Paste your key into Everflow API Key.
- Enter an optional Name that identifies this Everflow account.
- Under Offer Statuses to Sync, select at least one of Active, Paused, or Deleted. Active is selected by default.
- Under Integr8 Offer Visibility, keep Use source visibility or choose an override for every migrated offer.
- Select Create & Sync.
Create an Everflow Affiliate connection
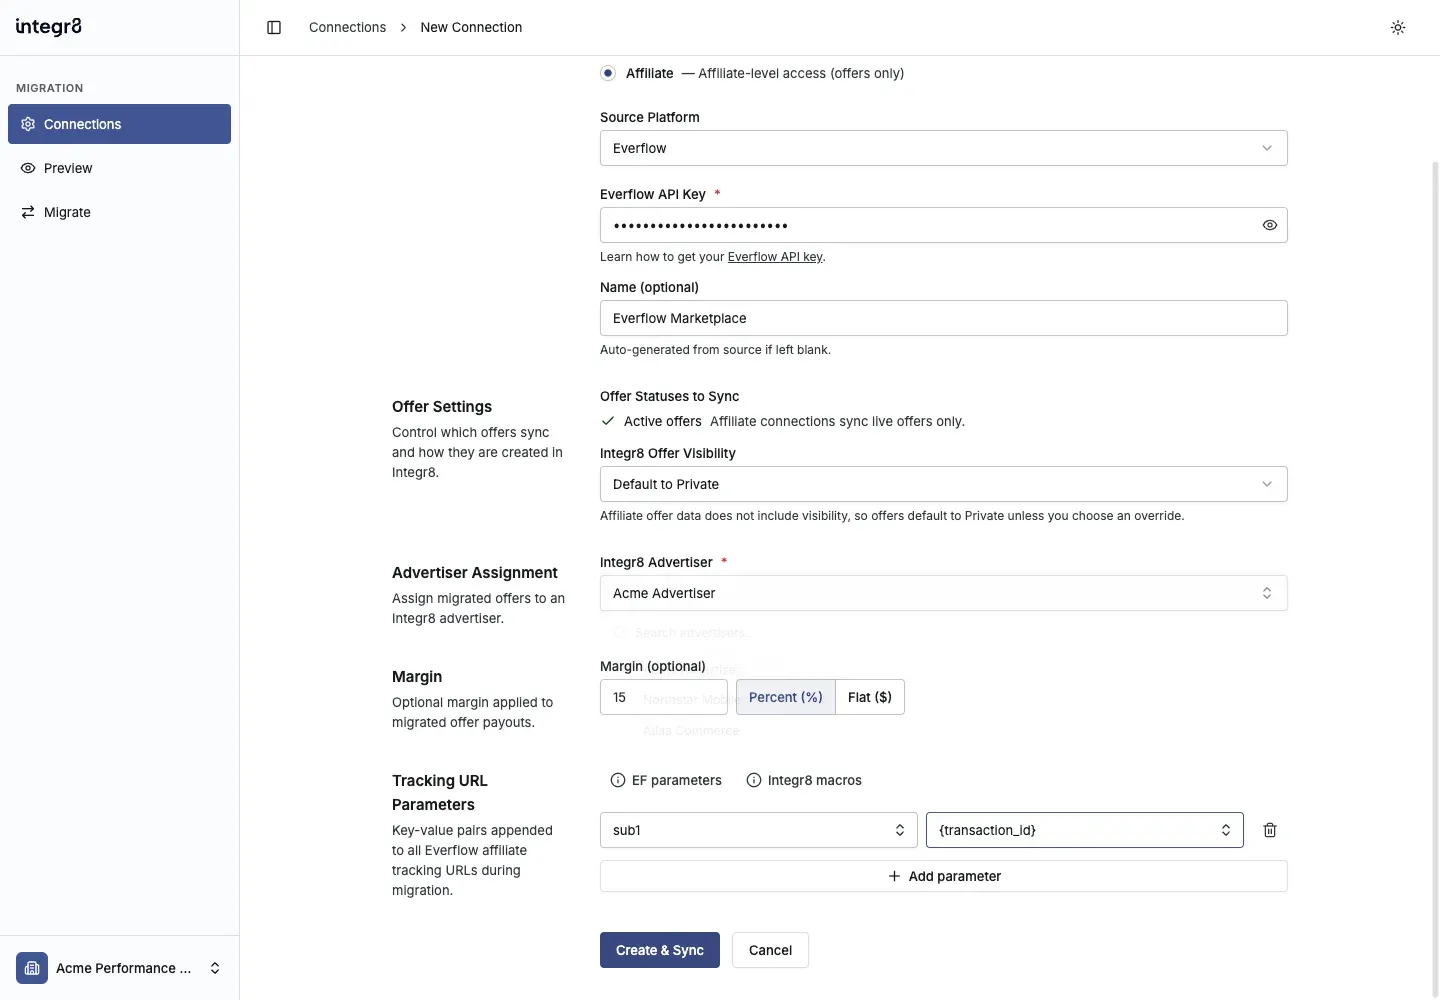
Section titled “Create an Everflow Affiliate connection”In this step, you connect a Marketplace account, assign all migrated offers to an Integr8 advertiser, and optionally define margin and tracking URL rules.
- On Connections, select Add Connection.
- Set Connection Type to Affiliate.
- Set Source Platform to Everflow.
- Paste your Marketplace key into Everflow API Key.
- Select the destination Integr8 Advertiser. You can also create an advertiser from this field.
- Set an optional Margin. A percentage or flat margin reduces the payout created in Integr8 while keeping the source payout as revenue.
- Under Integr8 Offer Visibility, keep Default to Private or choose another visibility for all migrated offers.
- Under Tracking URL Parameters, add any parameters that every migrated Everflow tracking URL needs. Use EF parameters and Integr8 macros to check available values.
- Select Create & Sync. Affiliate connections sync live offers only.
Sync Everflow data
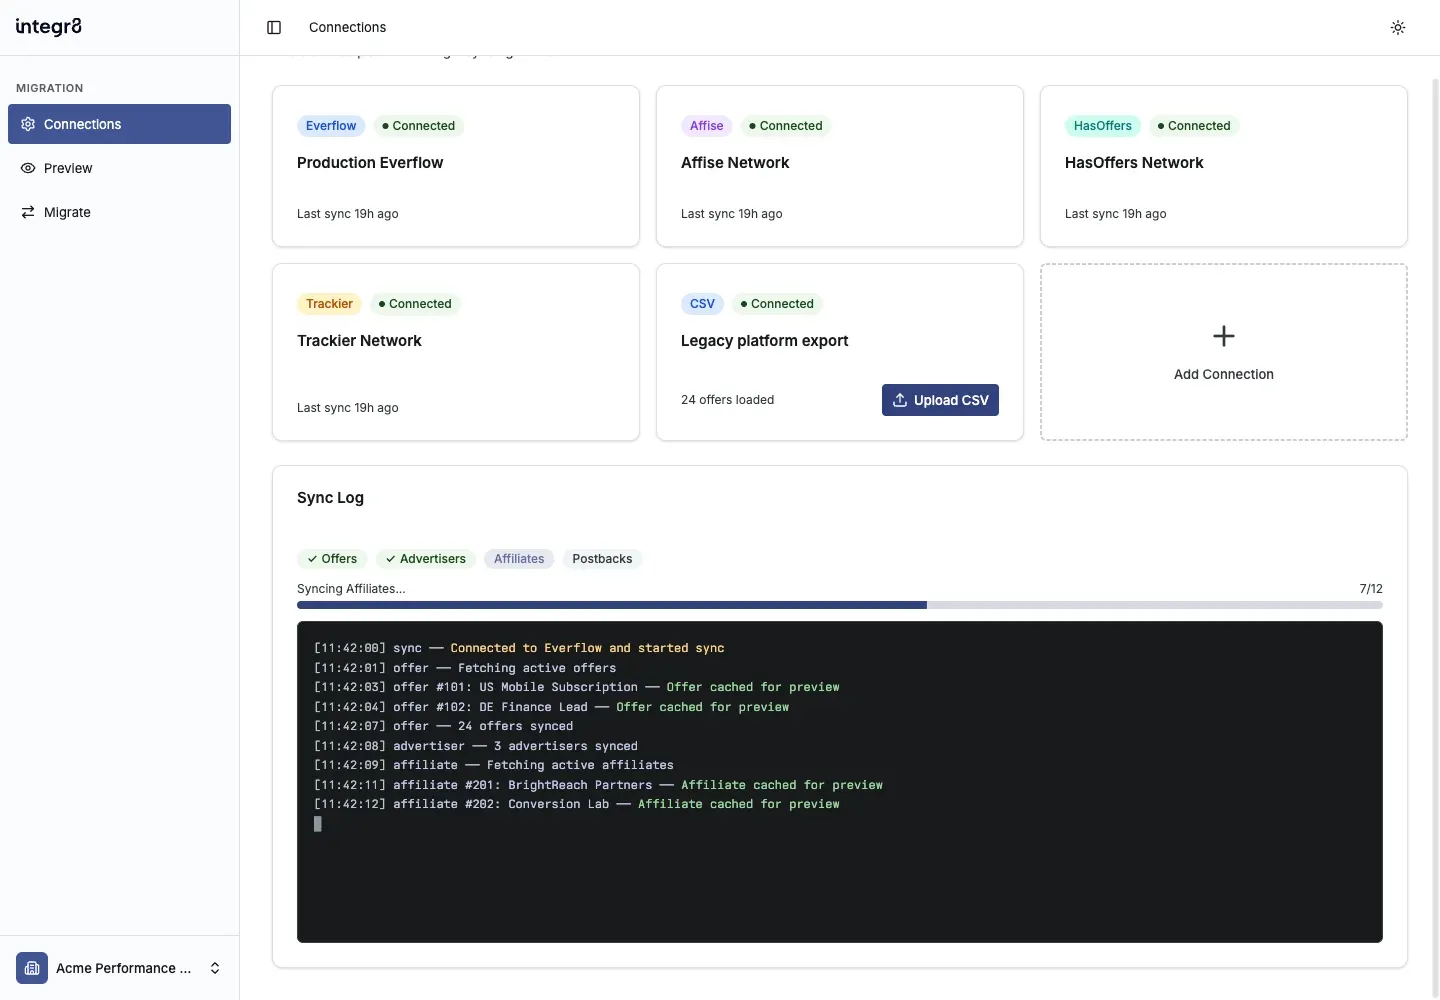
Section titled “Sync Everflow data”The sync copies Everflow records into a temporary Migration Tool preview. It does not change records in Everflow or create records in Integr8.
- Follow the phase badges in Sync Log.
- Review each live log entry as offers, advertisers, and affiliates are cached.
- Wait for the sync to complete before opening Preview.
Review and migrate Everflow data
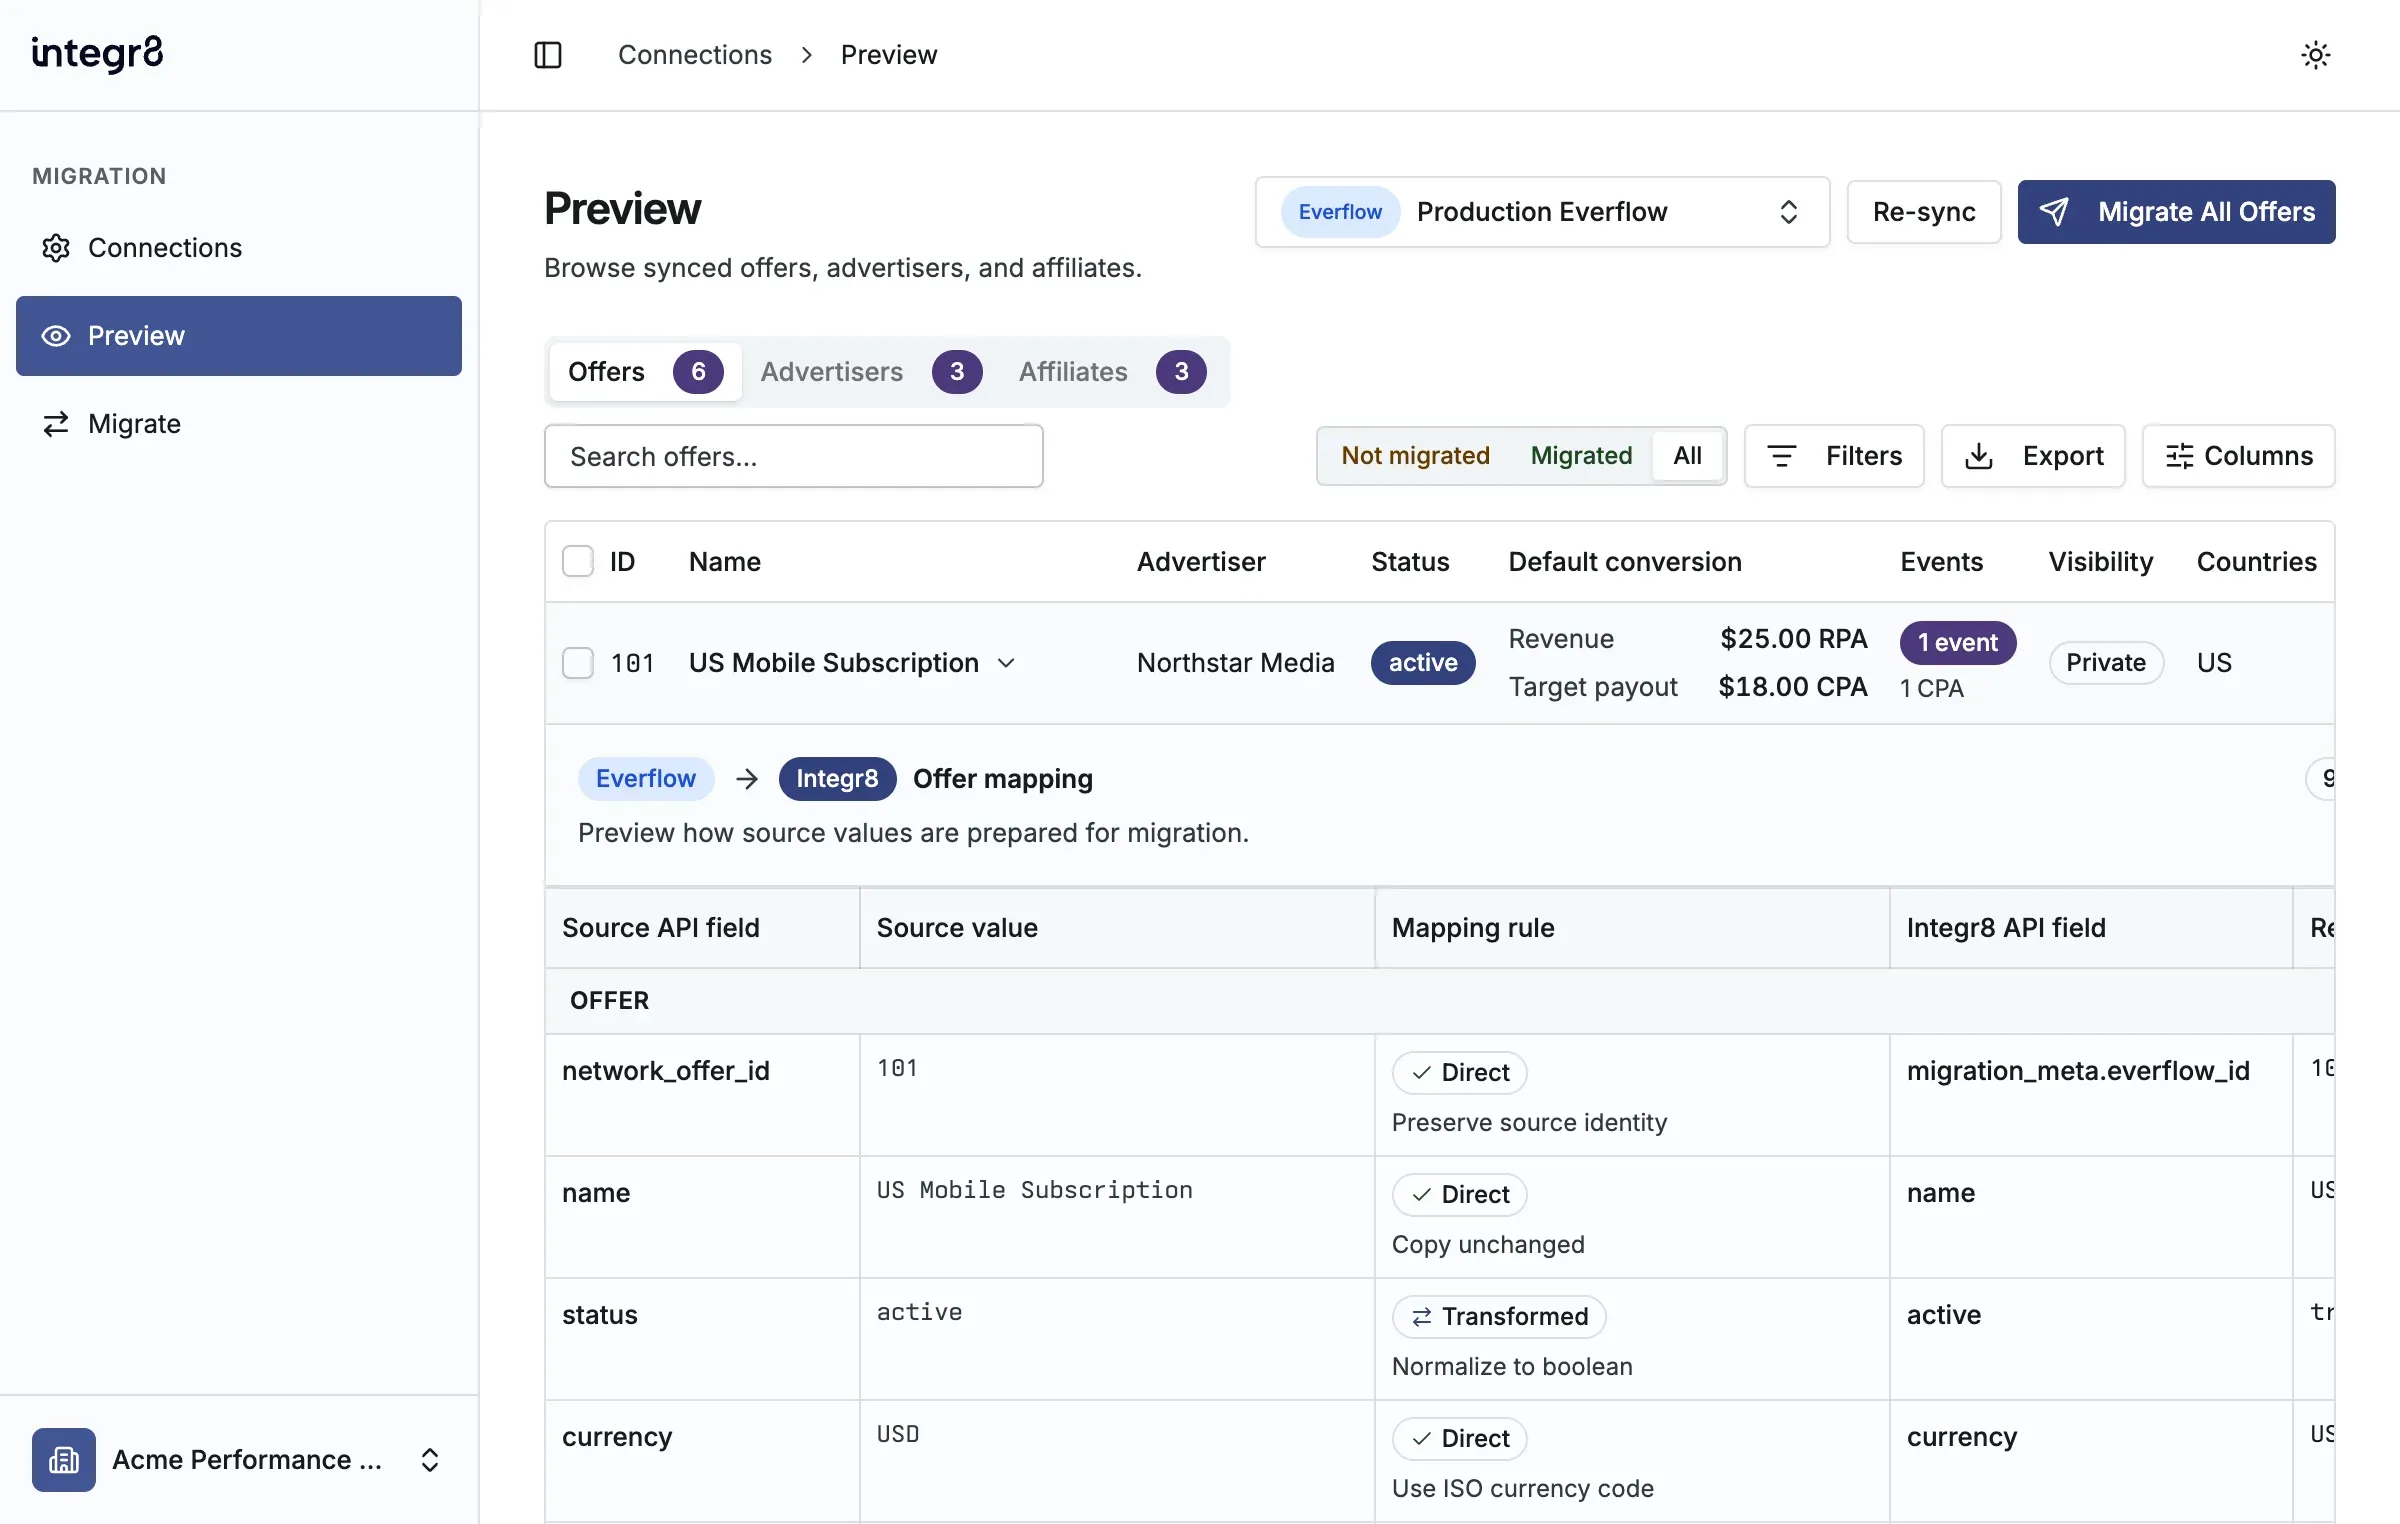
Section titled “Review and migrate Everflow data”In this step, you verify how Everflow fields map to Integr8, choose the records to move, and confirm the migration before anything is created.
- Open the Everflow connection card.
- On Preview, inspect the available tabs:
- Offers for names, advertisers, status, payout and revenue, events, visibility, targeting, and landing pages
- Advertisers for network advertiser records
- Affiliates for active Everflow affiliates that become Integr8 publishers
- Expand an offer to compare the Everflow API fields and values with the resulting Integr8 fields. Check which values are copied directly and which are transformed.
- Use All, Migrated, and Not migrated to check previous results, or use the filters to narrow the table.
- Select the rows you want to migrate. To migrate the complete active tab, use the corresponding Migrate All action.
- Confirm the entity count and select Start Migration.
Review migrated data
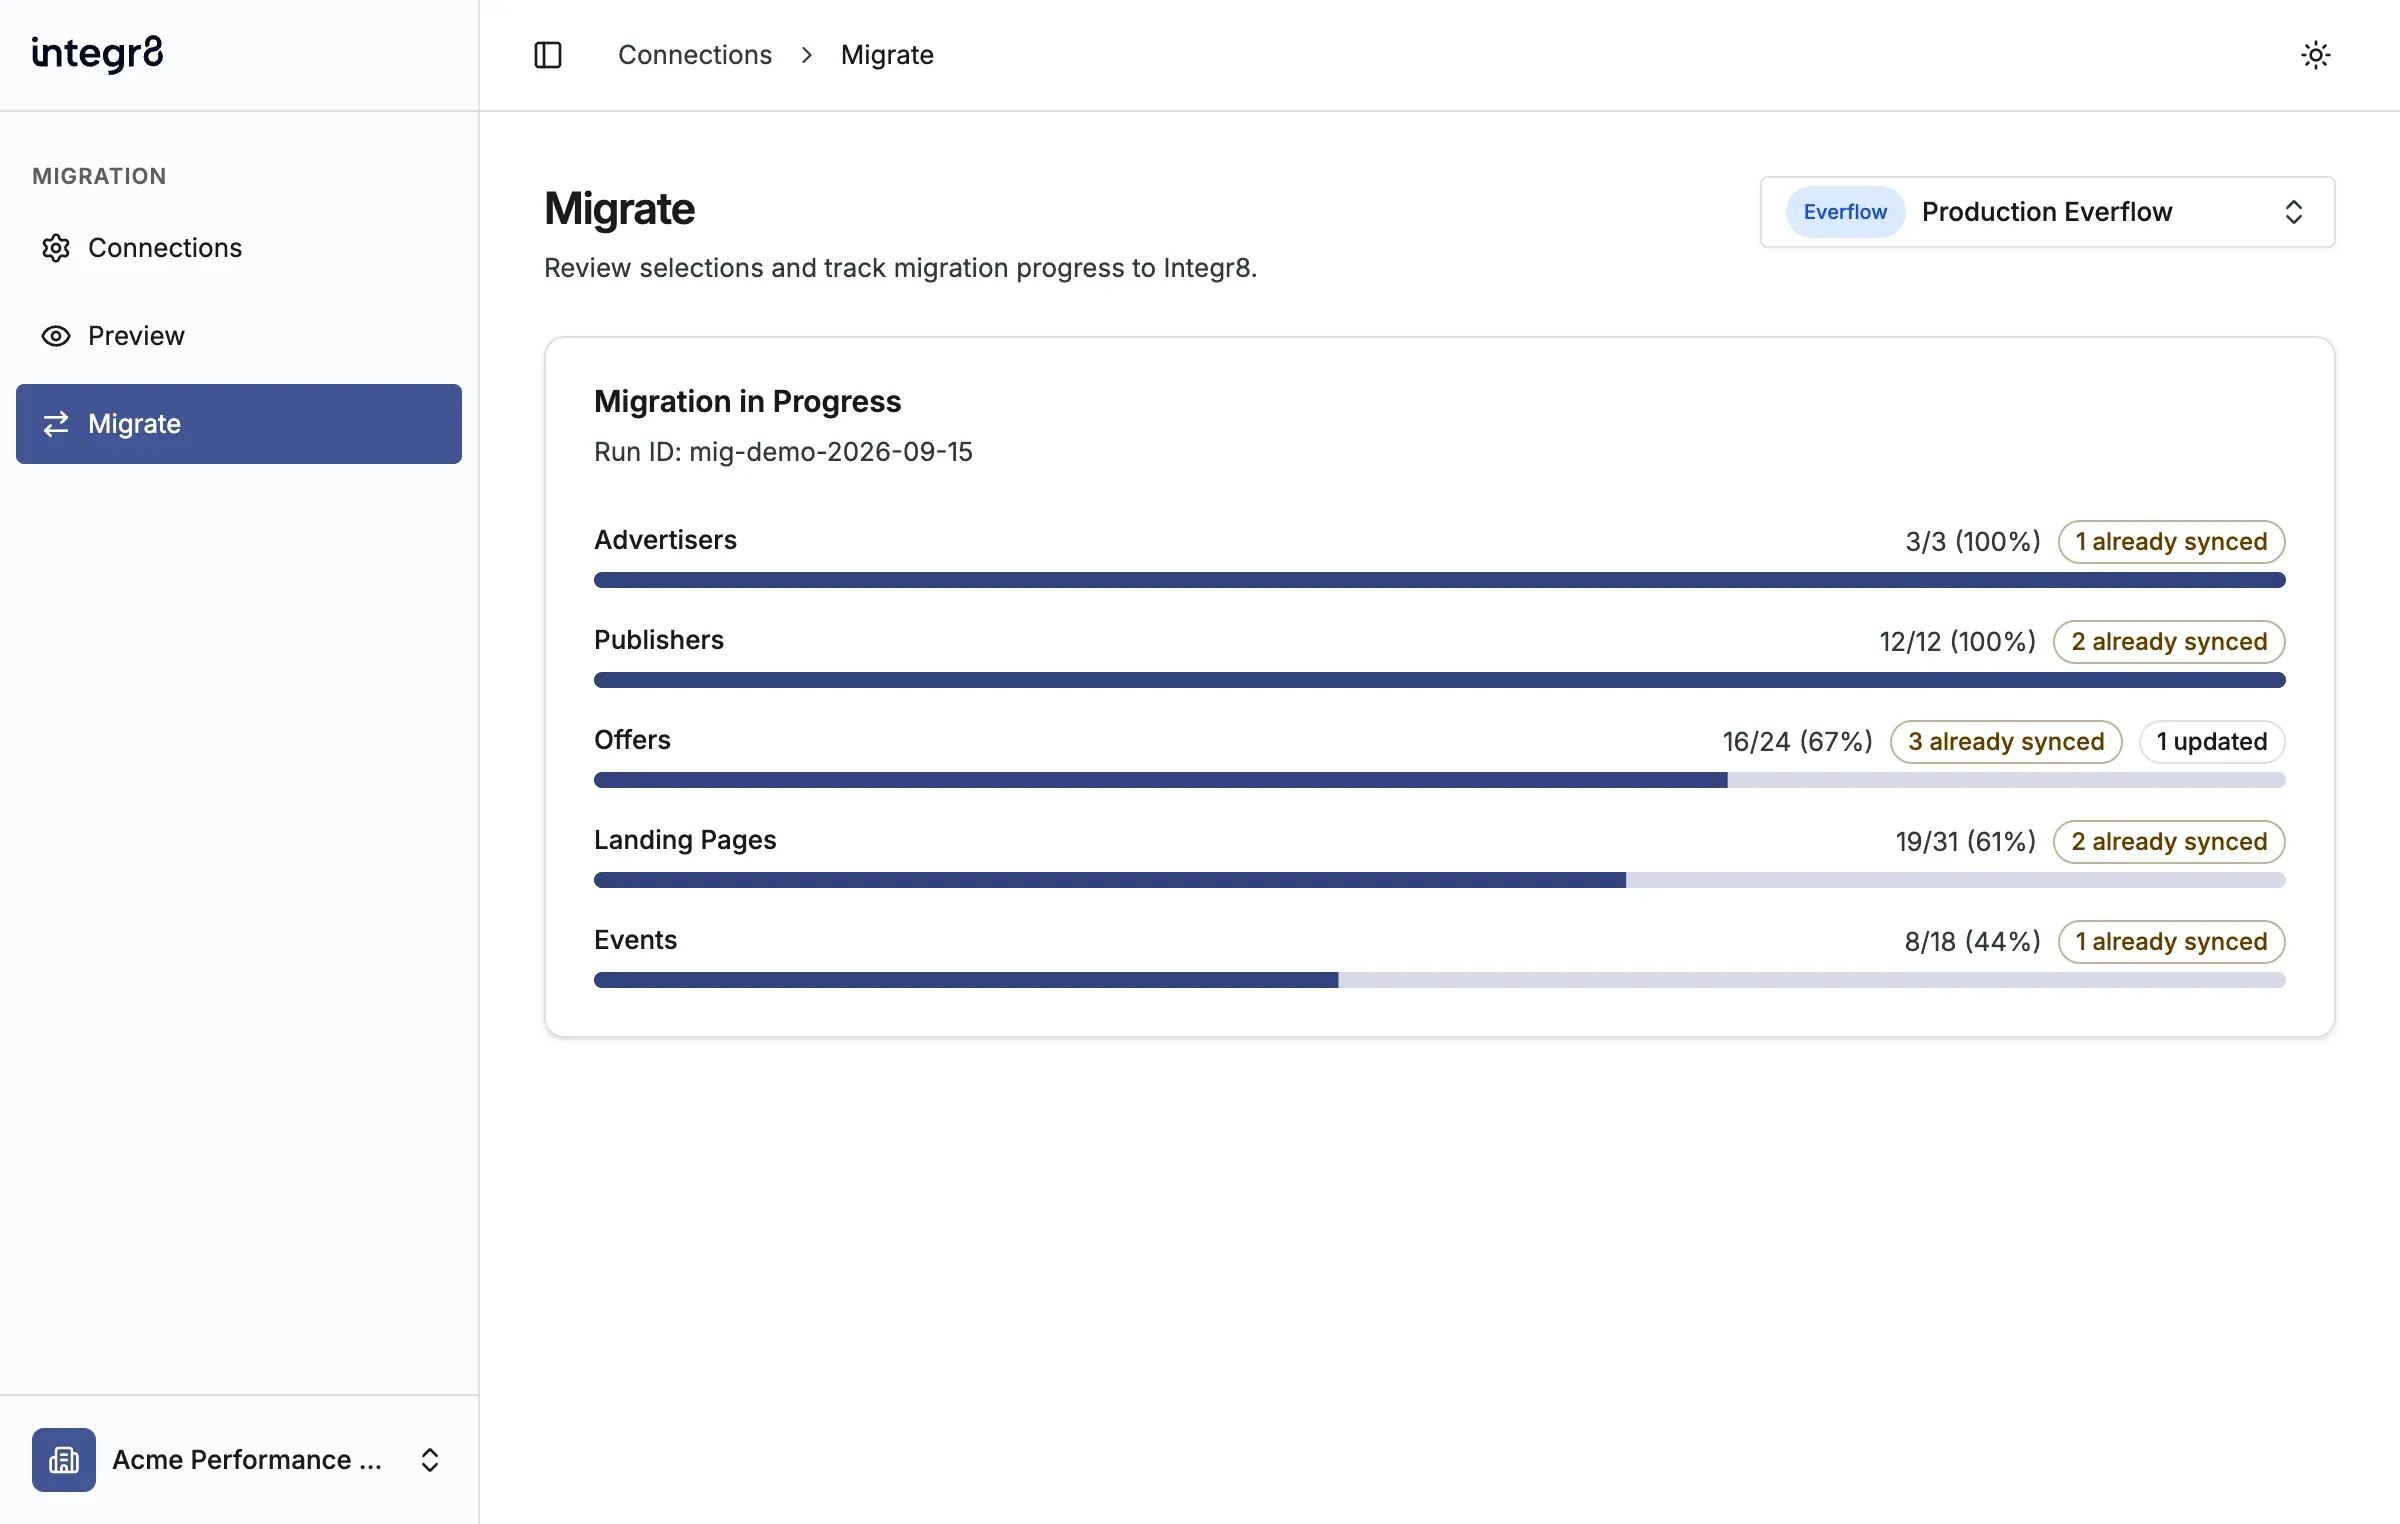
Section titled “Review migrated data”Use Migrate to confirm that each selected entity finishes successfully. The page shows live entity progress and continues to update while the server creates or reuses Integr8 records.
- Keep the Migrate page open while the migration runs.
- Review entity progress and the migration log for created, updated, already synced, or failed records.
- When the migration finishes, review the summary and open the resulting records in Integr8.
Re-sync or change settings
Section titled “Re-sync or change settings”- Use Re-sync on Preview after changing data in Everflow.
- Use the connection action menu on Connections and select Edit to change statuses, visibility, margin, tracking parameters, or the API key.
- Leave the API key blank while editing to keep the saved key.
If the Everflow key is rejected or you cannot sign in, email support@integr8.co.