

Import offers from CSV
Use a CSV file when your tracking platform does not have a supported API connection or when you only need to migrate offers. CSV import creates offers under one existing Integr8 advertiser.
Before you begin
Section titled “Before you begin”- You need your Integr8 email address and password.
- Create the destination advertiser in Integr8 before starting the import.
- Prepare a CSV file with one offer per row and a header row.
- Include a name column. It is the only required column mapping.
Supported CSV fields
Section titled “Supported CSV fields”| Integr8 field | Required | Purpose |
|---|---|---|
| Name | Yes | Offer name |
| Redirect URL | No | Default offer landing page URL |
| Description | No | Public offer description |
| Currency | No | Offer currency |
| Payout | No | Default payout value |
| Payout Type | No | Default payout model |
| Internal Note | No | Internal offer note |
| Visibility | No | Offer visibility |
| Platform | No | Source platform label |
Advertisers, publishers, events, additional landing pages, creatives, postbacks, and historical reporting data are not imported from CSV.
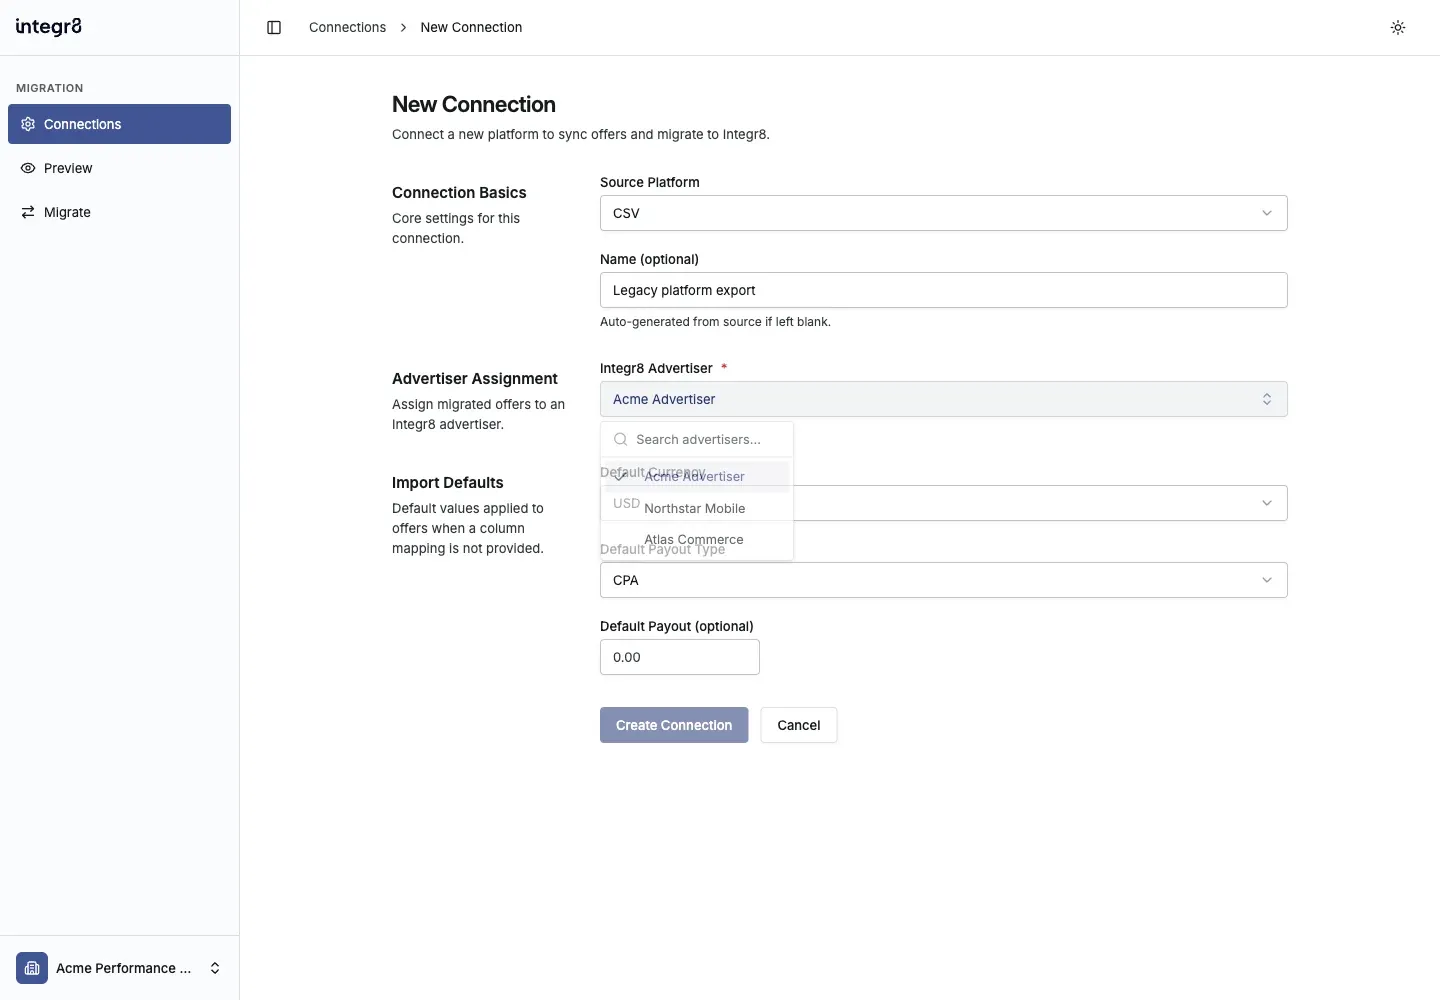
Create a CSV connection
Section titled “Create a CSV connection”In this step, you choose the Integr8 advertiser that will own every imported offer and define fallback values for columns that are not present in the file.
- Open the Migration Tool and sign in with your Integr8 credentials.
- On Connections, select Add Connection.
- Set Source Platform to CSV.
- Enter an optional Name for the import.
- Select the destination Integr8 Advertiser. You can also create an advertiser from this field.
- Set Default Currency, Default Payout Type, and an optional Default Payout. Defaults are used when the matching CSV field is not mapped.
- Select Create Connection.
Upload and map the CSV file
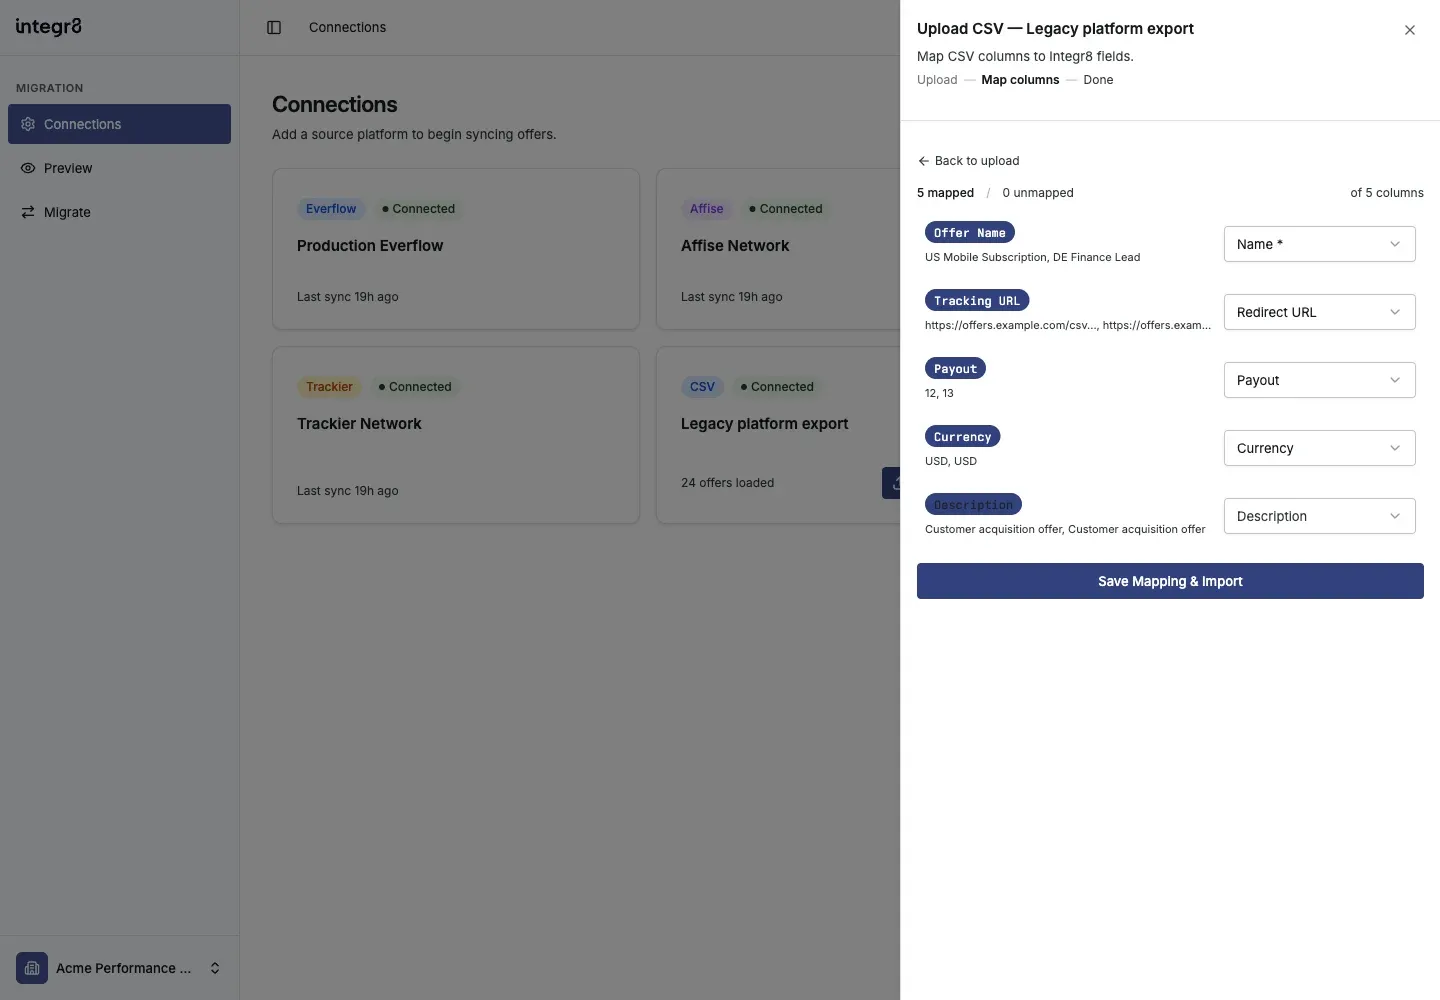
Section titled “Upload and map the CSV file”In this step, you match each source column to one Integr8 offer field. The mapping controls how every CSV row is interpreted before migration.
- On the CSV connection card, select Upload CSV.
- Drop the file into the upload area or choose it from your computer.
- Check the detected row and column count. Use Preview first 5 rows to verify that the file was read correctly.
- Select Next: Map Columns.
- For each CSV header, select an Integr8 field or Ignore.
- Map one column to Name. Each Integr8 field can be mapped only once.
- Select Save Mapping & Import.
- Review the mapping summary, then select View Imported Offers.
Review and migrate CSV data
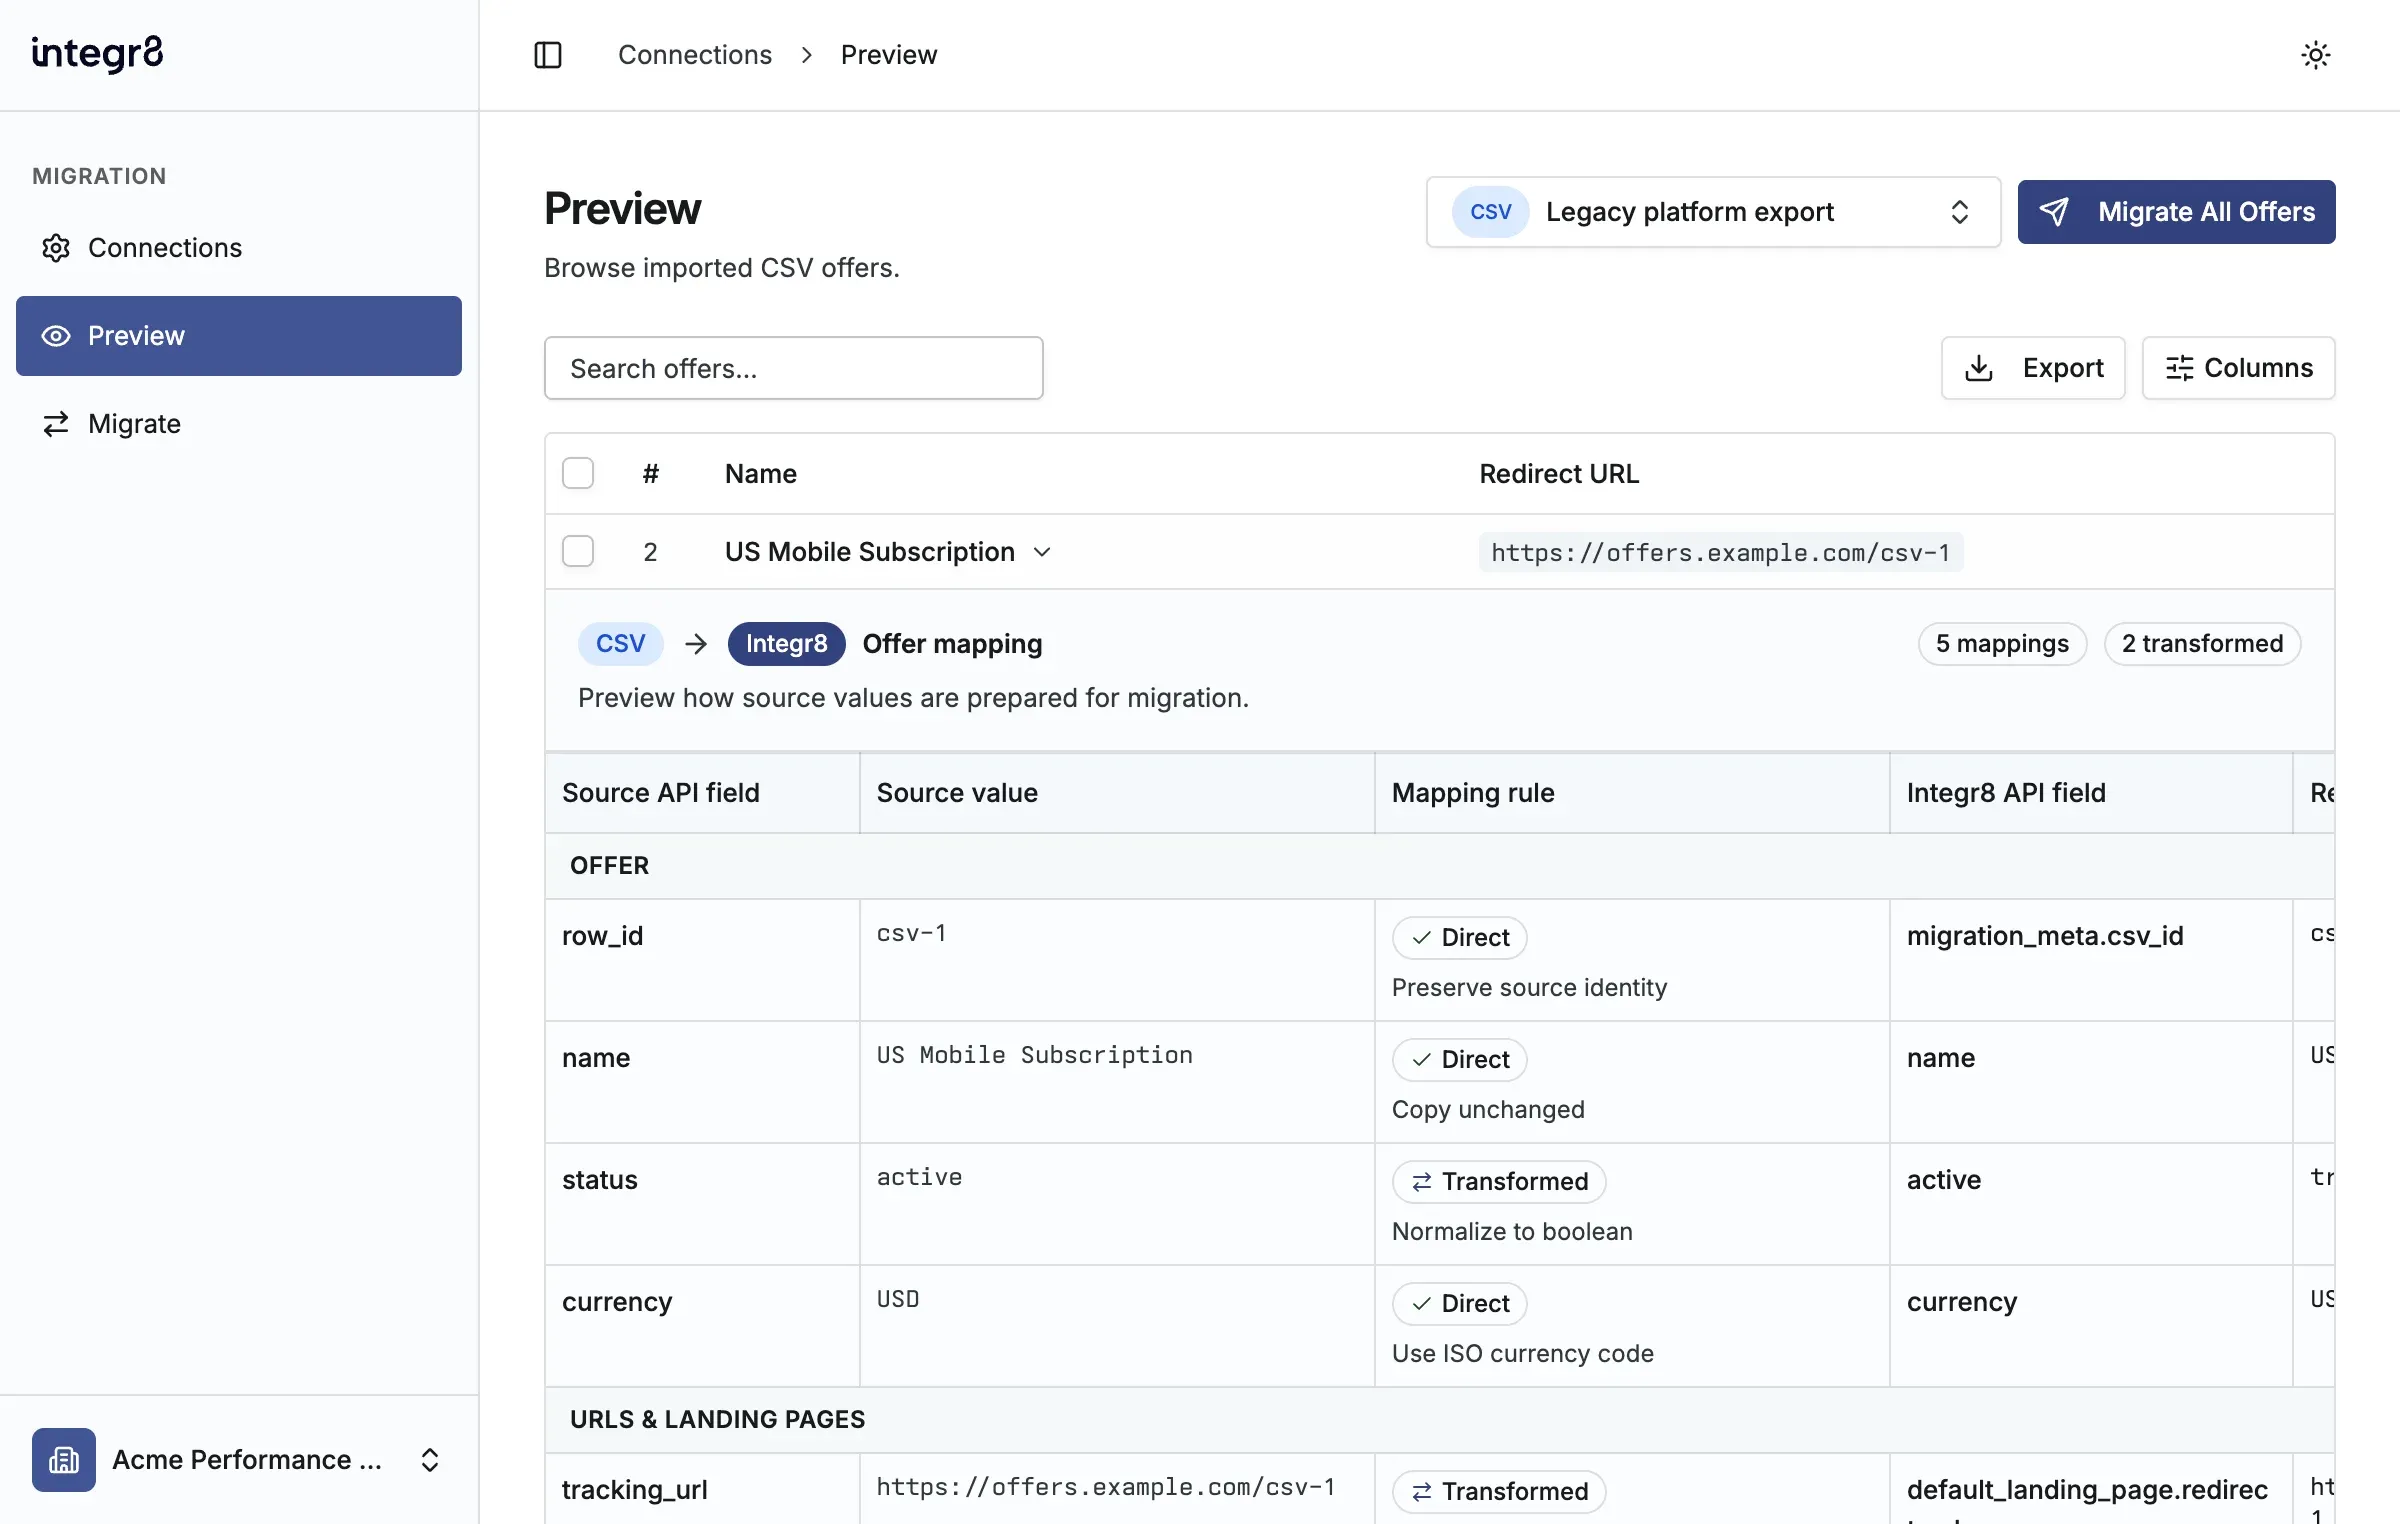
Section titled “Review and migrate CSV data”In this step, you verify the imported rows and their final Integr8 values, then choose which offers to create.
- On Preview, search the imported rows and check the Name and Redirect URL values.
- Expand an offer to compare imported values and connection defaults with the Integr8 fields that migration will create.
- Select individual offers or use Migrate All Offers.
- Confirm the count and select Start Migration.
Review migrated data
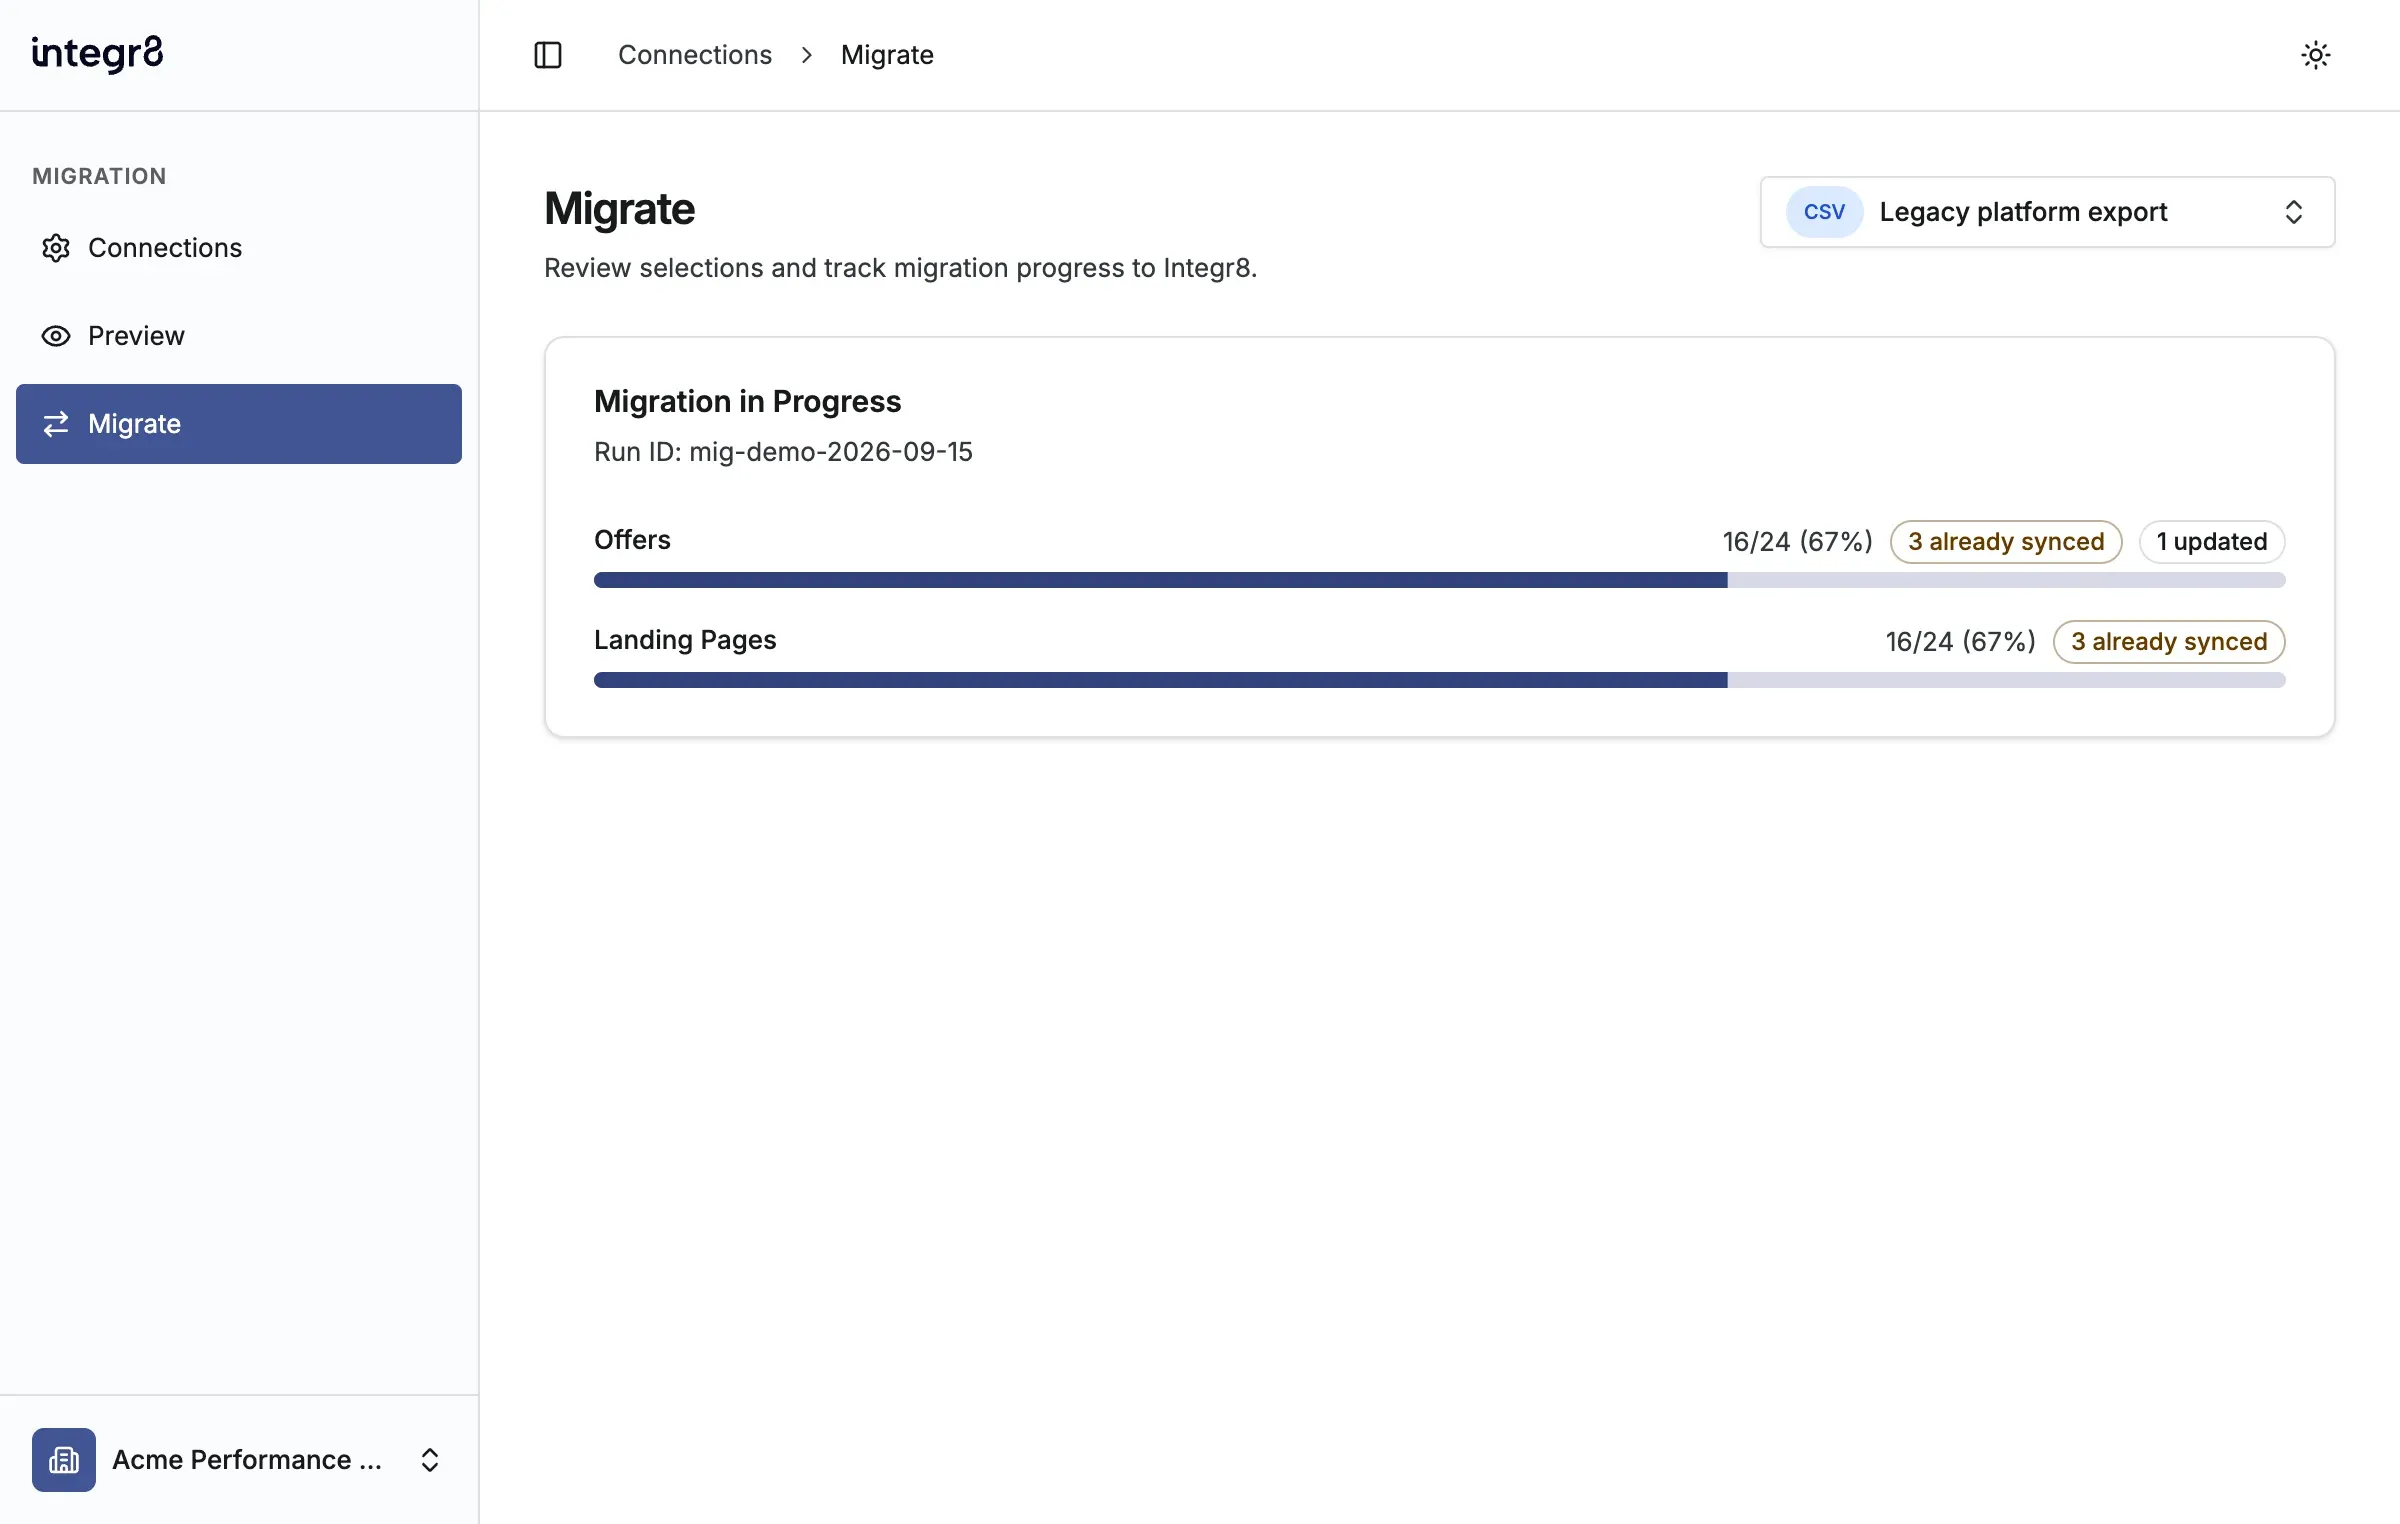
Section titled “Review migrated data”Use Migrate to confirm that each selected CSV offer and its default landing page finish successfully.
- Keep the Migrate page open while the migration runs.
- Review the offer and landing page progress for created, updated, already synced, or failed records.
- When the migration finishes, review the summary and open the resulting offers in Integr8.
Uploading another file to the same CSV connection replaces the preview used for that connection. Review the rows again before starting another migration.
If the file cannot be read or a required value is missing, correct the CSV and upload it again. For more help, email support@integr8.co.