

Migration Tool
Use the Migration Tool to copy selected setup data from your current tracking platform into Integr8. You can review every synced entity before migration. The tool does not delete data from your current platform.
Before you begin
Section titled “Before you begin”- Use an Integr8 account with access to your organization’s attribution integration.
- Prepare an API key or network token for your current tracking platform.
- Confirm which offer statuses you want to copy.
- Plan to review the migrated records in Integr8 before using them for live traffic.
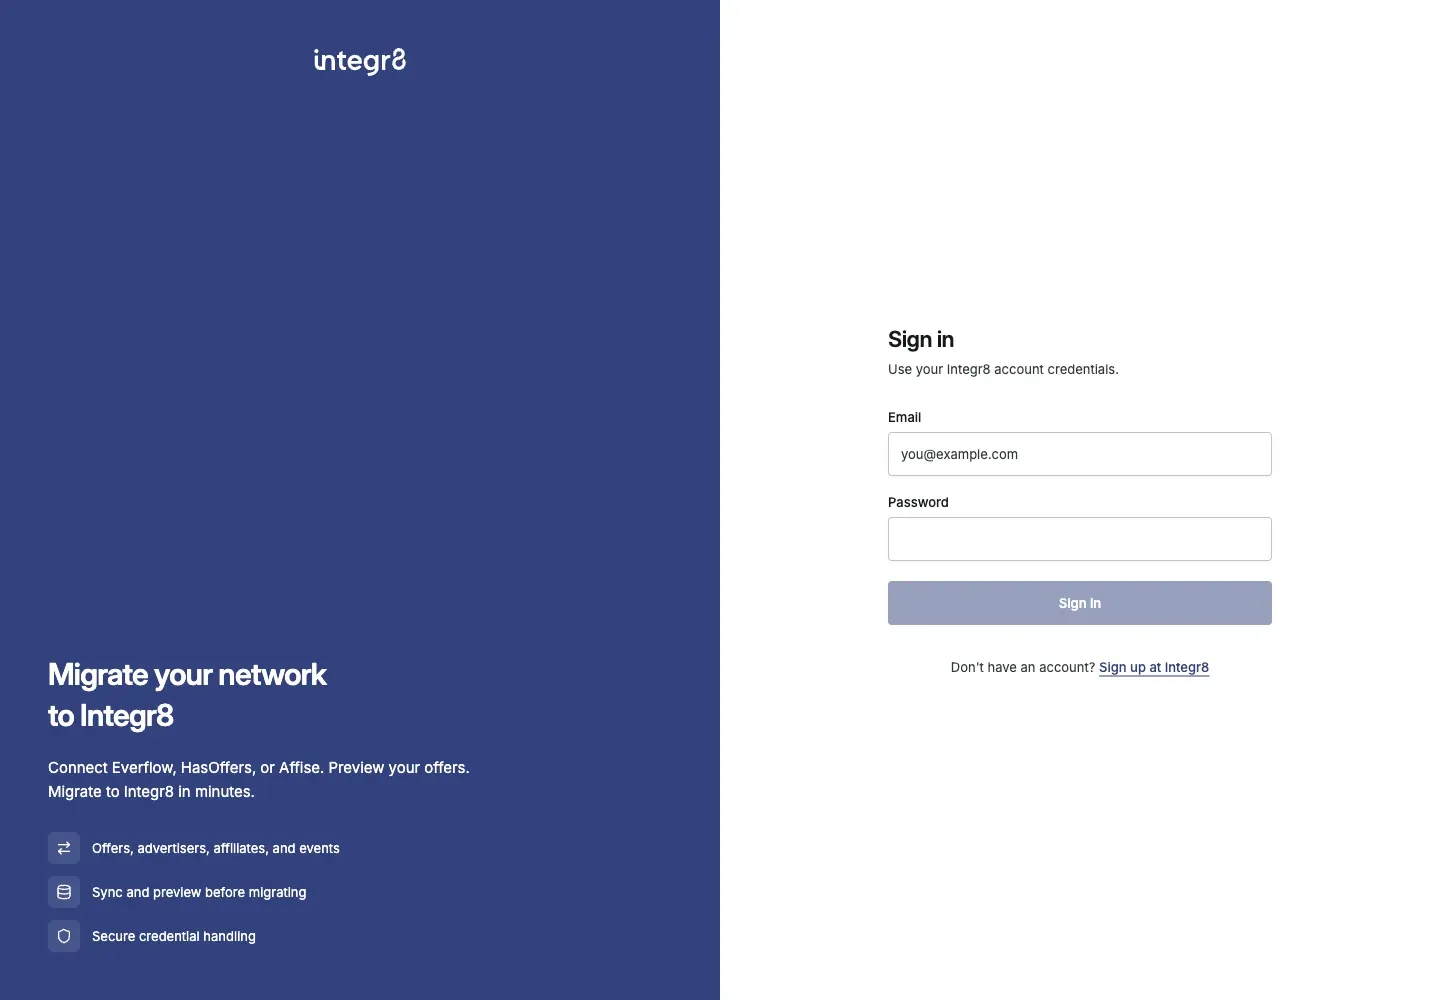
Open the Integr8 Migration Tool and sign in with your normal Integr8 email address and password. If you cannot sign in, email support@integr8.co.
Supported platforms and access levels
Section titled “Supported platforms and access levels”A Network connection reads network-level data. An Affiliate connection reads only the offers available to your affiliate account and assigns them to an advertiser that already exists in Integr8.
| Source | Network connection | Affiliate connection | Setup guide |
|---|---|---|---|
| Everflow | Yes | Yes | Migrate from Everflow |
| Affise | Yes | Yes | Migrate from Affise |
| HasOffers | Yes | No | Migrate from HasOffers |
| Trackier | Yes | No | Migrate from Trackier |
| CSV file | Offer import only | No | Import offers from CSV |
Migration coverage matrix
Section titled “Migration coverage matrix”A check means the entity can be migrated at that access level. Assigned means you select an existing Integr8 advertiser instead of creating one from the source. Included means the item is migrated as part of its parent offer or publisher.
| Entity | Everflow network | Everflow affiliate | Affise network | Affise affiliate | HasOffers network | Trackier network | CSV |
|---|---|---|---|---|---|---|---|
| Advertisers | ✓ | Assigned | ✓ | Assigned | ✓ | ✓ | Assigned |
| Publishers or affiliates | ✓ | No | ✓ | No | ✓ | ✓ | No |
| Publisher login users | No | No | No | No | No | Included | No |
| Offers or campaigns | ✓ | ✓ | ✓ | ✓ | ✓ | ✓ | ✓ |
| Landing pages | Included | Included | Included | Included | Included | Included | Default URL only |
| Events or goals | Included | Included | Included | Included | Included | Included | No |
| Publisher-specific payouts | No | No | No | No | No | Included | No |
| Postbacks | No | No | No | No | No | Included | No |
| Creatives | No | No | No | No | No | No | No |
Only eligible Trackier publisher users, payouts, and postbacks are included. The Preview page shows exclusions or migration warnings when a source value cannot be represented safely in Integr8.
Connect your platform
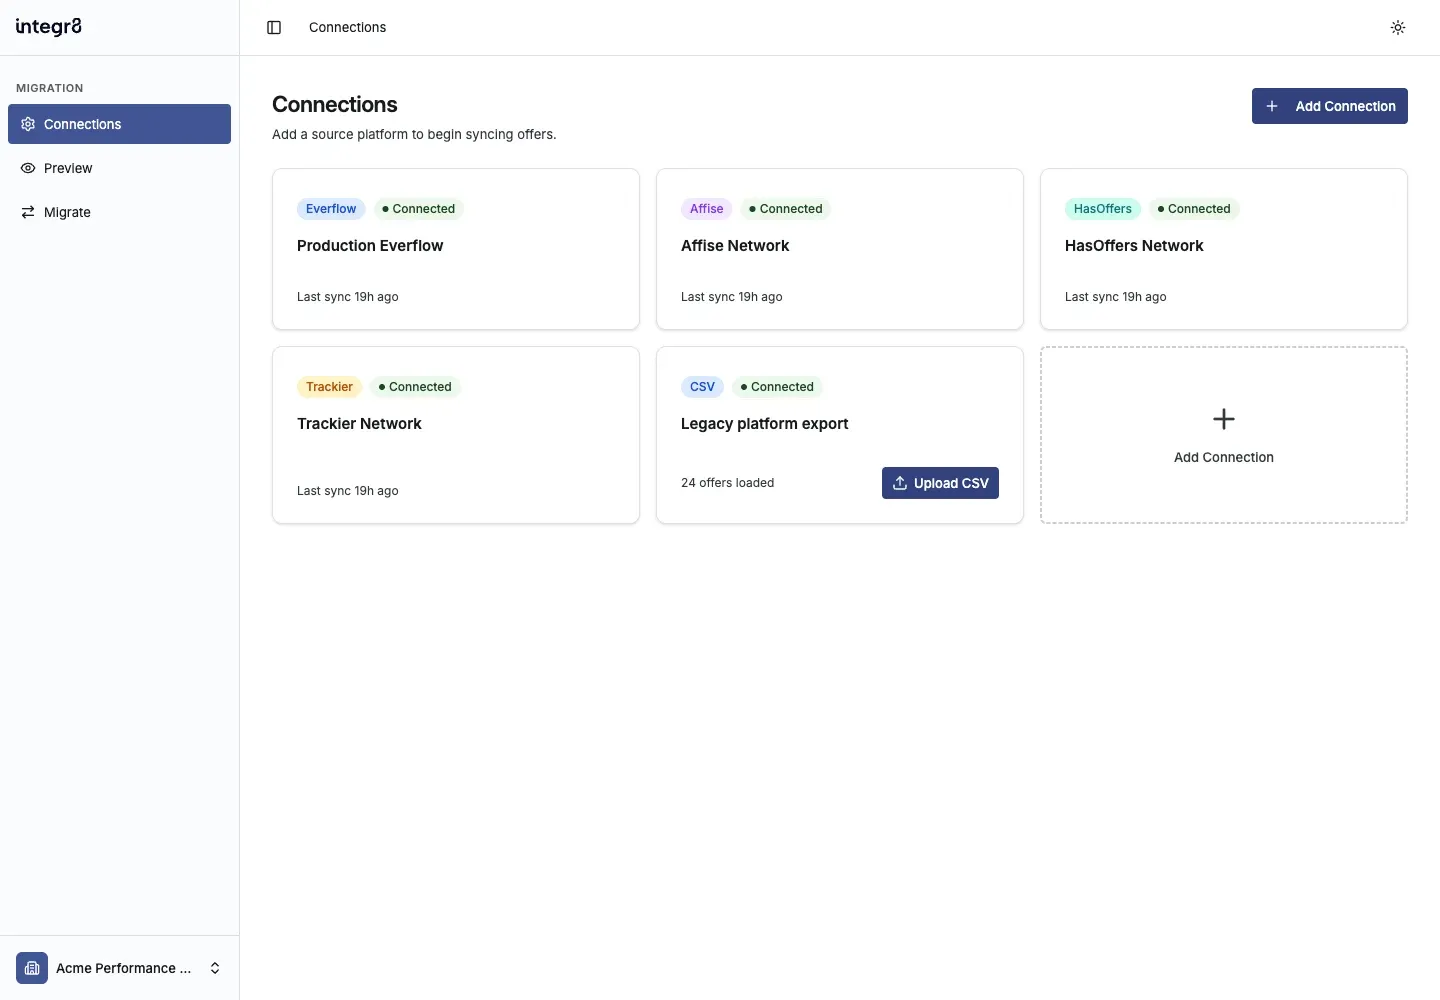
Section titled “Connect your platform”- Sign in to the Migration Tool with your Integr8 credentials.
- On Connections, select Add Connection.
- Choose the correct Connection Type and Source Platform.
- Enter the source credentials and any platform-specific settings.
- Review Offer Statuses to Sync and Integr8 Offer Visibility.
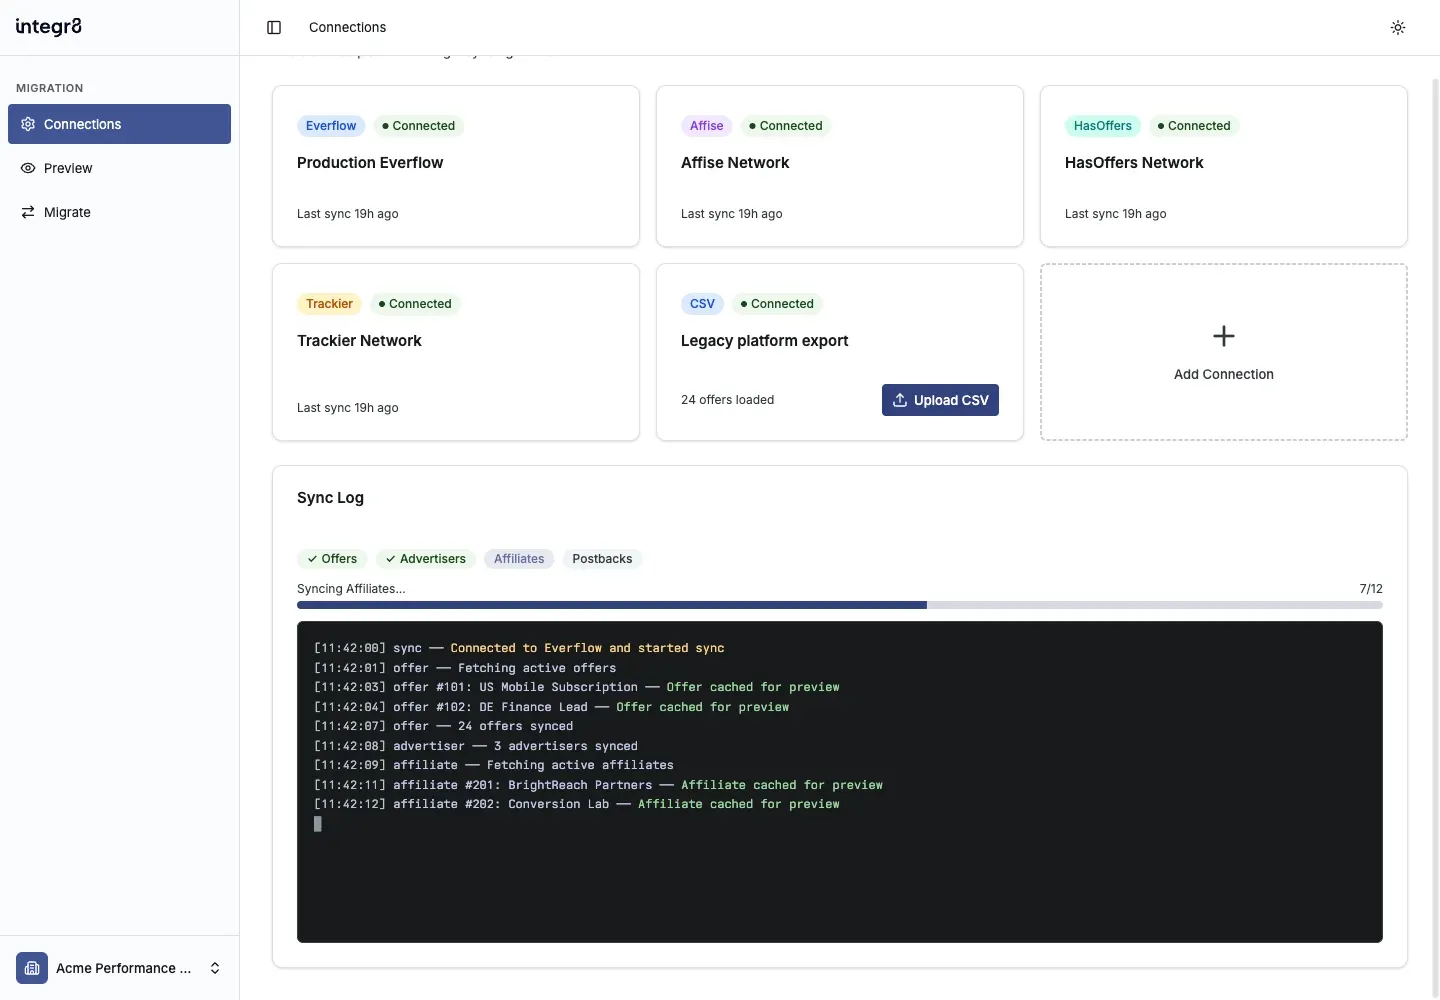
- Select Create & Sync. The source data is copied into a temporary preview in the Migration Tool.
- Follow Sync Log until every available phase completes. The log shows which records are being cached for preview.
Review the synced data
Section titled “Review the synced data”- Wait for the Sync Log to finish, then open the connection card.
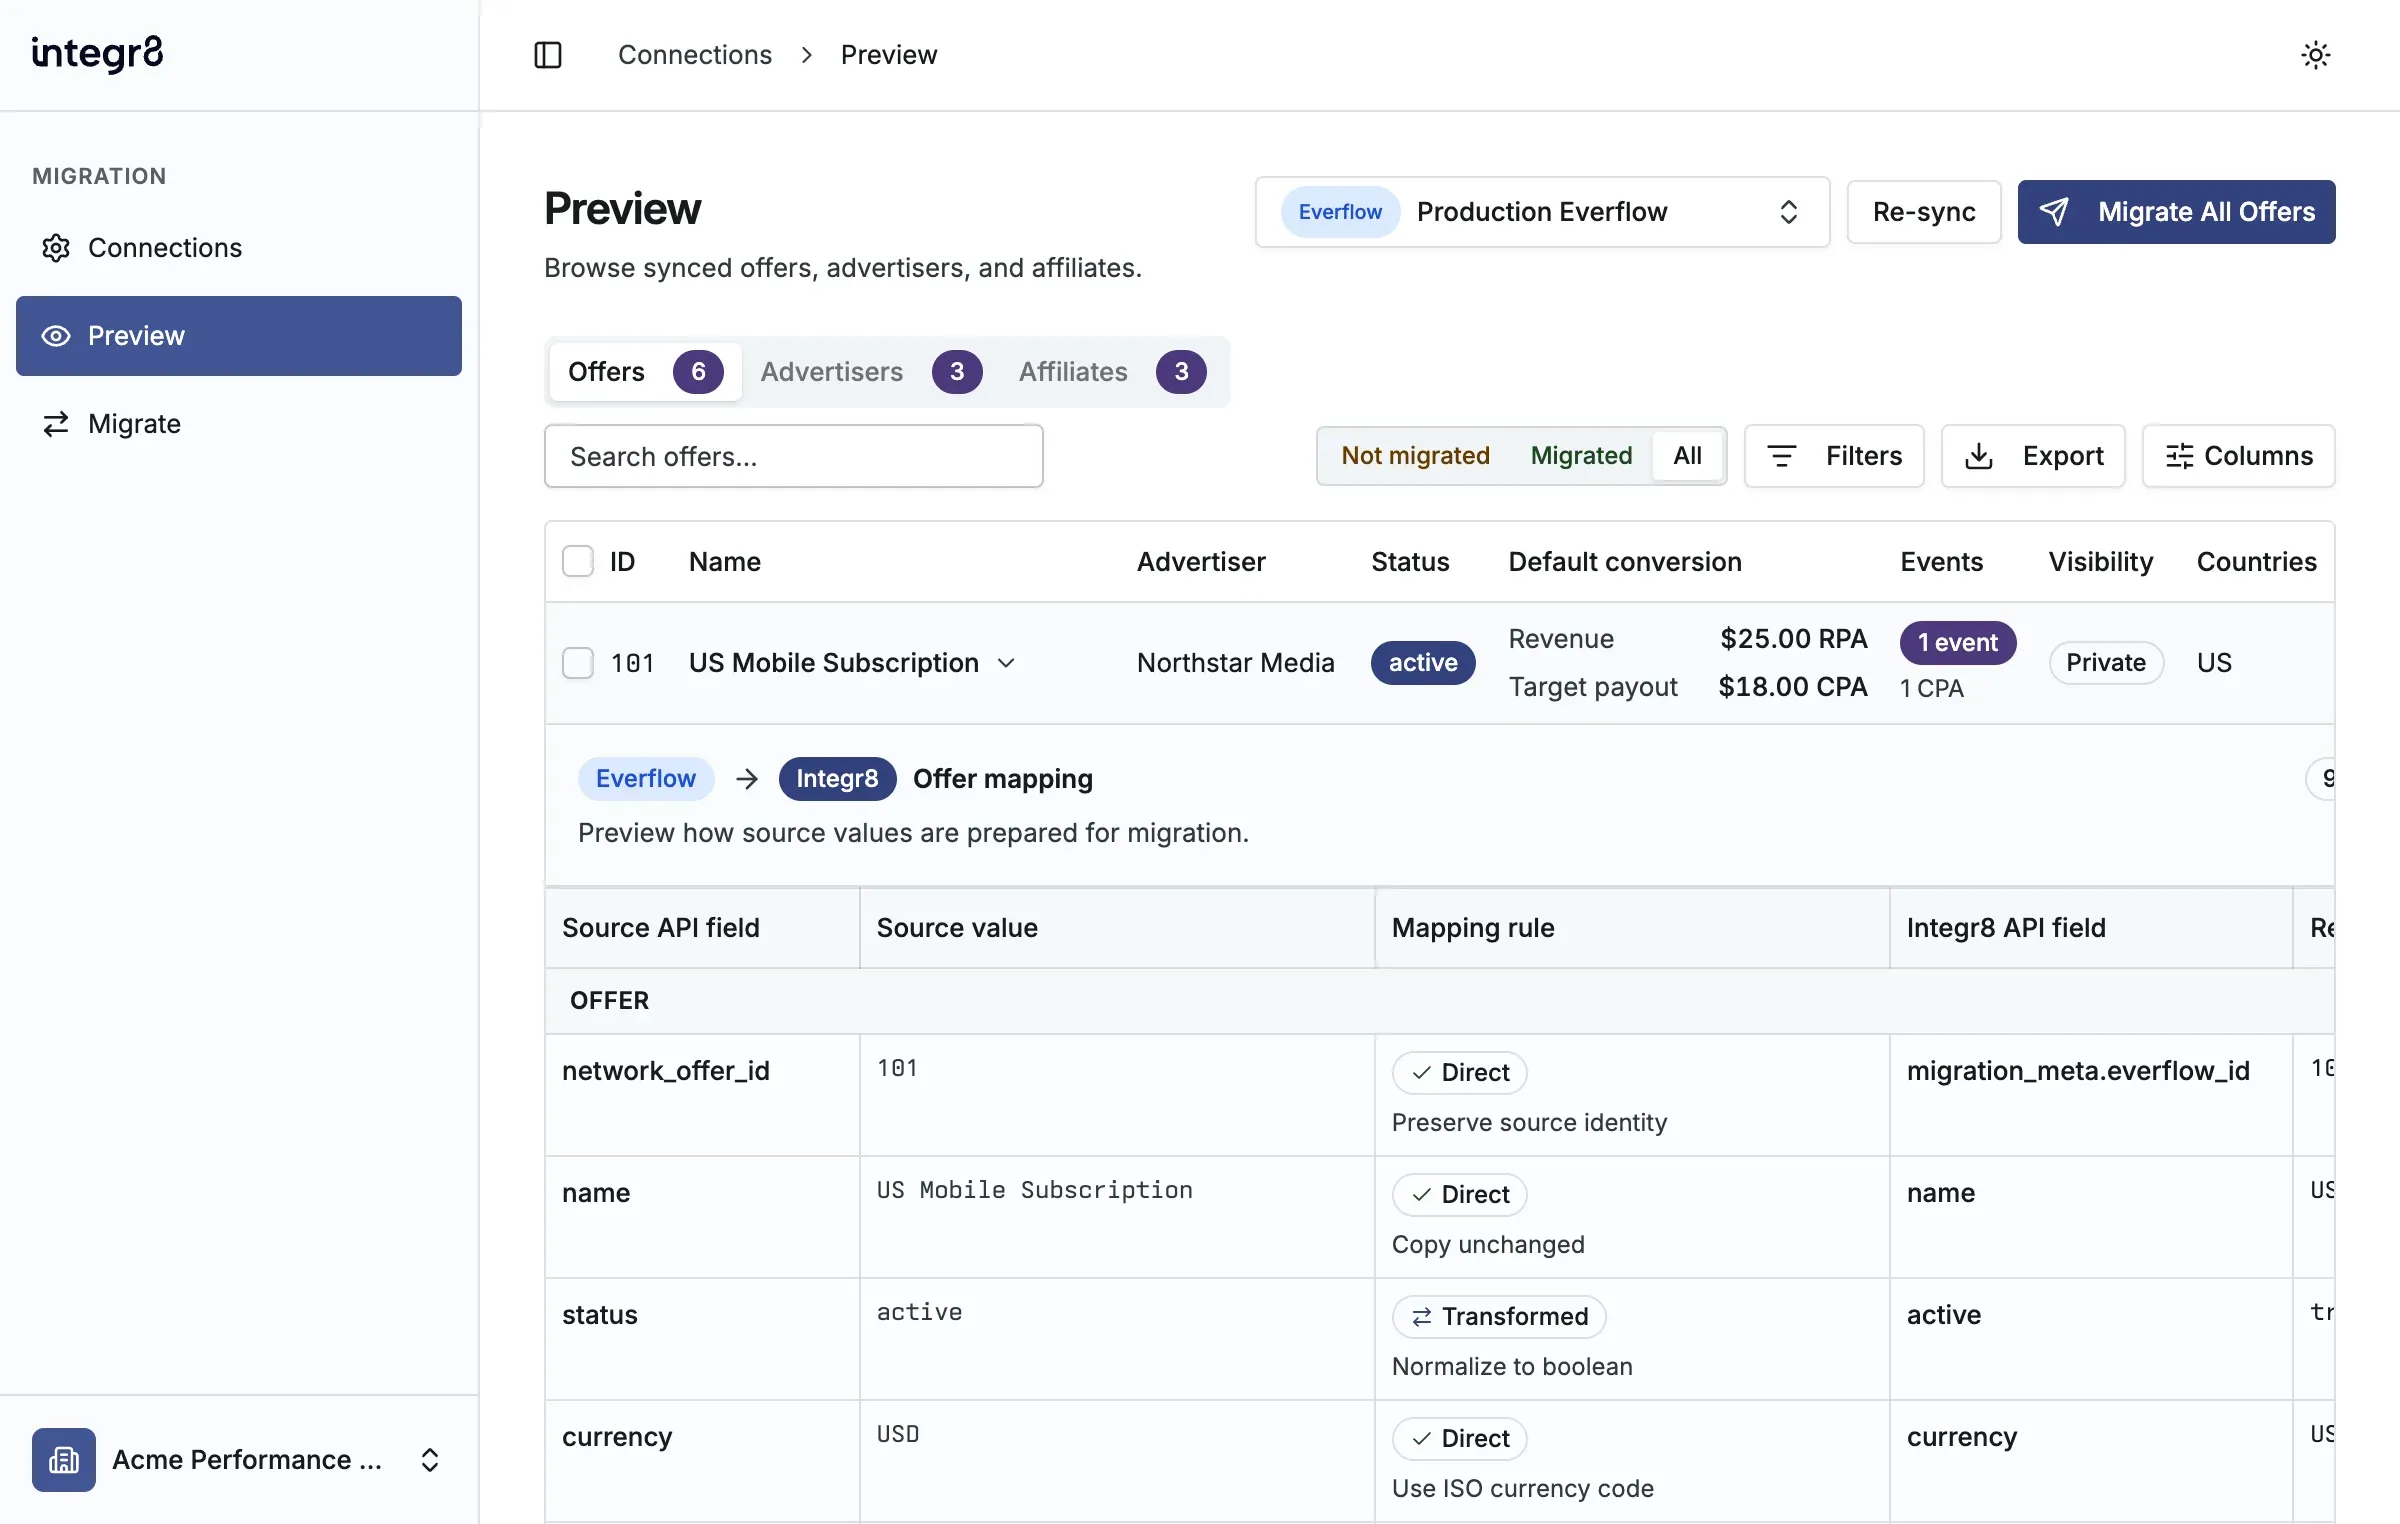
- Use the connection selector beside the page title to switch sources without returning to Connections.
- Use the Offers, Advertisers, and Affiliates tabs that are available for your connection.
- Expand an offer to compare its source values with the values that Integr8 will receive.
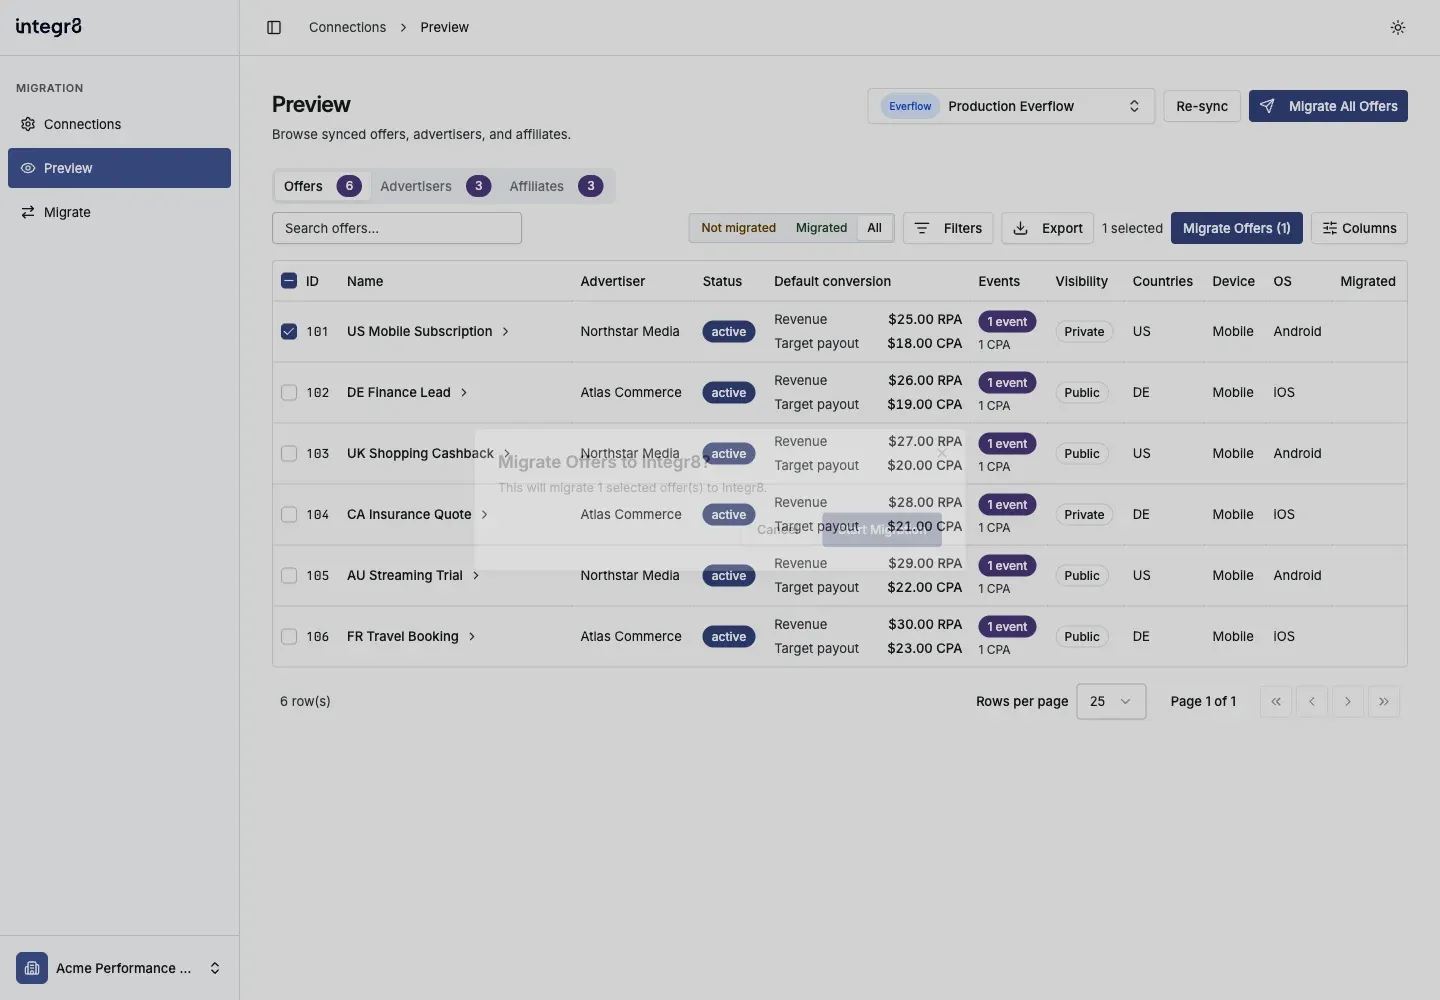
- Search, filter, export, or select rows. Use All, Migrated, and Not migrated to check previous migration results.
- Select individual rows, or use Migrate All Offers, Migrate All Advertisers, or Migrate All Affiliates for the active tab.
- Use Re-sync if you change source data and need a fresh preview.
The expanded mapping labels each value as Direct, Transformed, Omitted, or None. Resolve any item marked Omitted before migration when the missing value is required.
For a network connection, migrate advertisers and publishers separately if you want all of them. Migrating offers includes only the dependencies needed by those selected offers.
Start and monitor the migration
Section titled “Start and monitor the migration”- Review the selected entity count in the confirmation dialog.
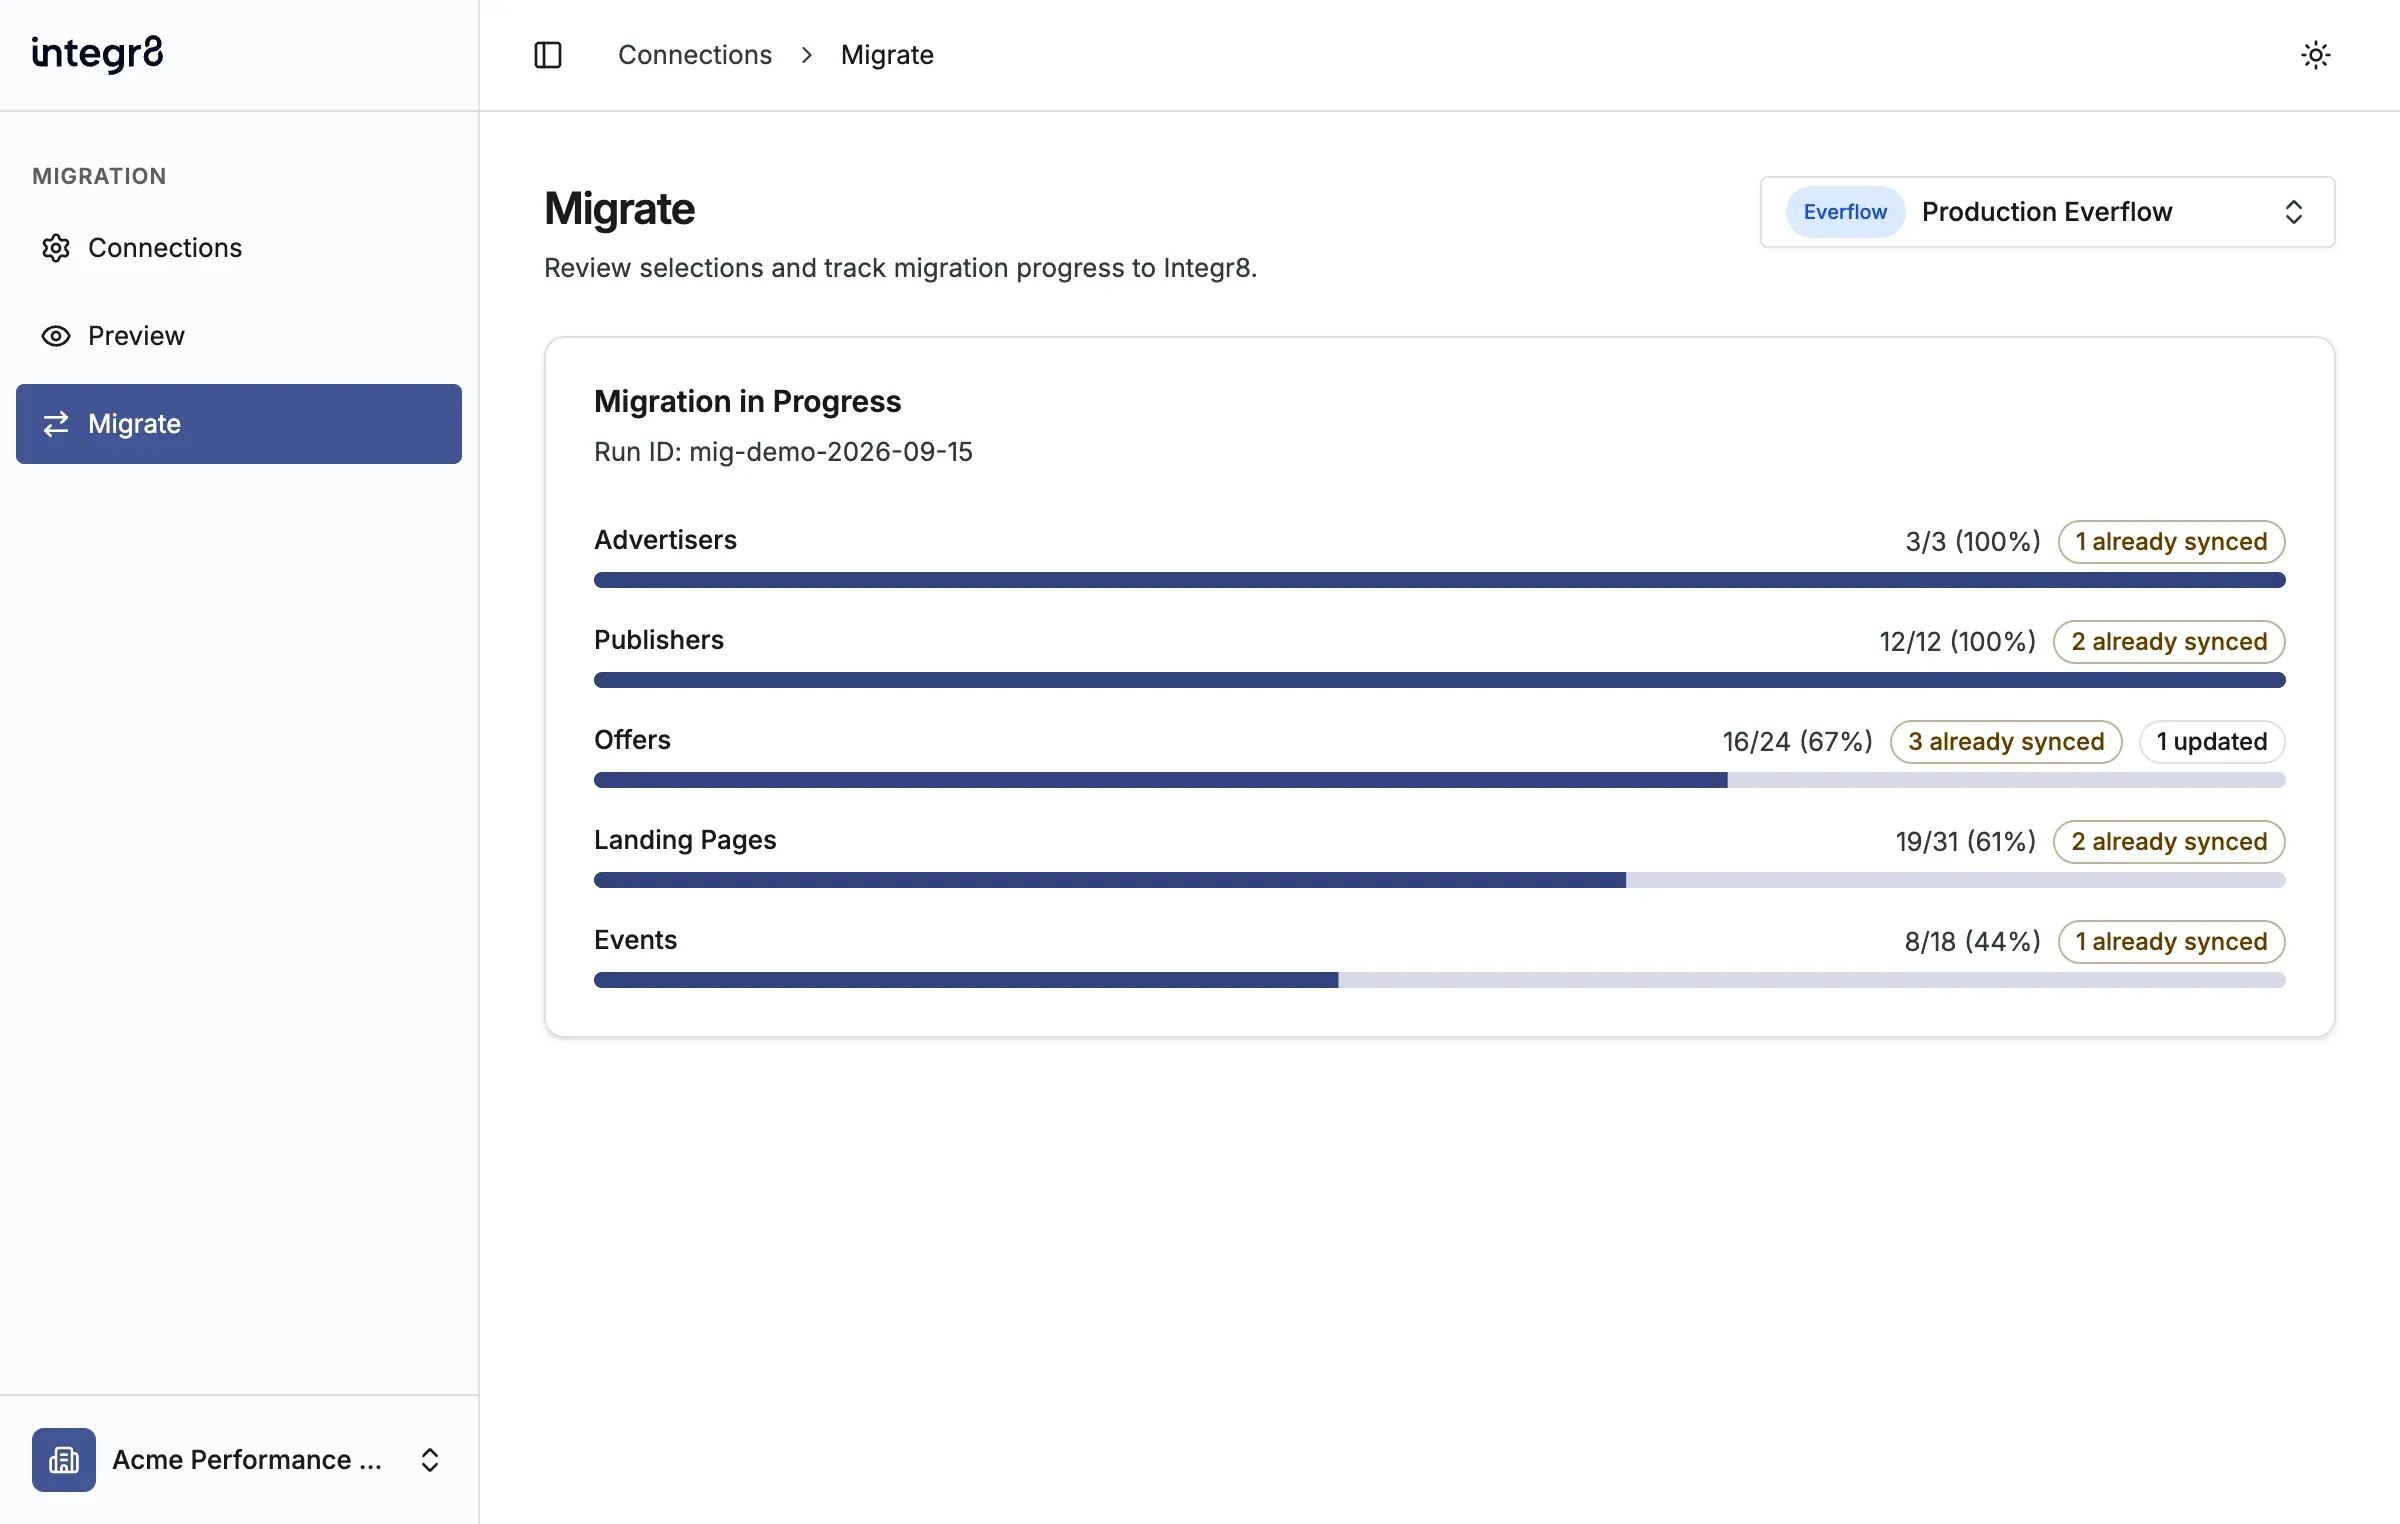
- Select Start Migration. The Migration Tool opens Migrate and starts creating or updating records in Integr8. The action cannot be undone from the Migration Tool.
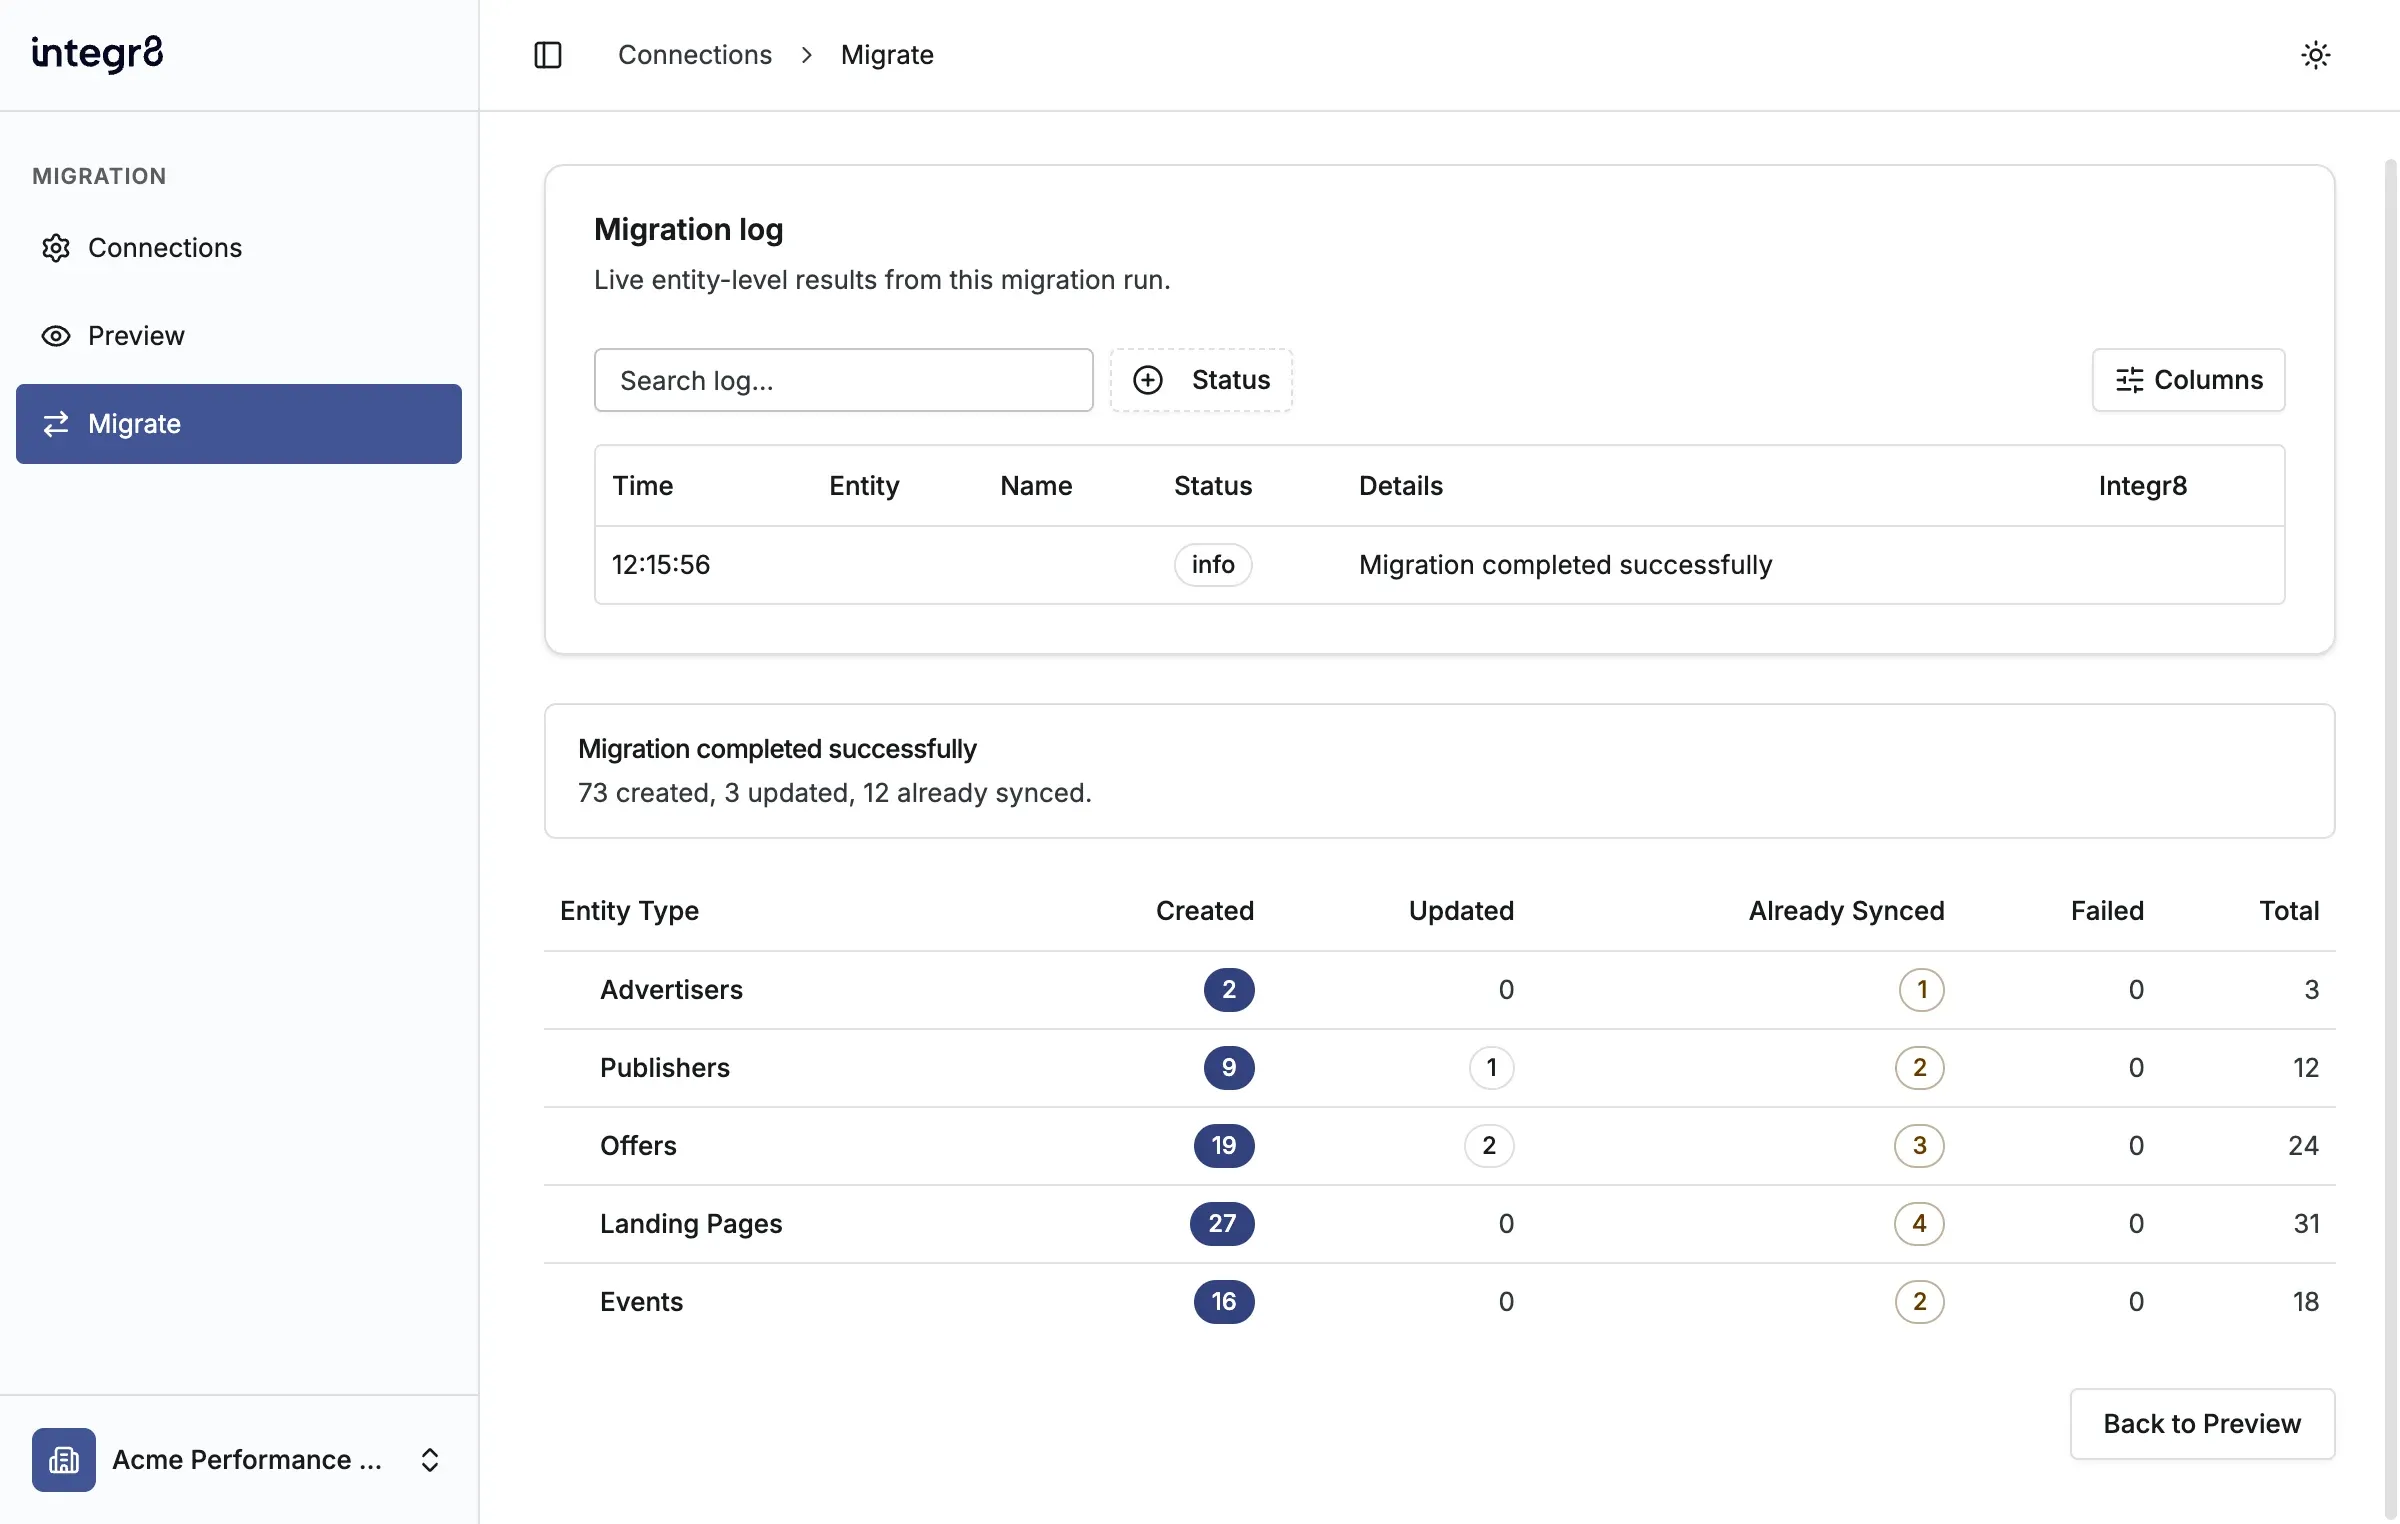
- Keep the Migrate page open to watch entity progress and the migration log. The server continues the migration if the browser connection is interrupted.
- Review the final summary for created, updated, already synced, failed, and warning counts.
- Follow the Integr8 links in the results to inspect migrated records.
The tool matches previously migrated records by source ID. If local migration state was lost, open the connection action menu on Connections, select Edit, then open Advanced > Migration state recovery and select Reconcile migration state. Normal migrations already check for existing records, so use reconciliation only as a recovery tool.
Data not migrated
Section titled “Data not migrated”The Migration Tool does not copy:
- Historical clicks, impressions, conversions, or reports
- Billing records, invoices, or payments
- Creatives
- Unsupported source rules or values marked Omitted or listed as an exclusion or warning in the preview
Keep your current tracking platform available until you have checked the migrated configuration and completed your traffic cutover.
Get help
Section titled “Get help”For sign-in problems, missing entities, or migration failures, email support@integr8.co. Include your Integr8 organization name, source platform, connection name, and a screenshot of the error.